|
Age Range: 7 to 12
Grade Range: 2 to 6
Skill Level: Easy
Appropriate for These Special Events:
Every Day and Rainy Days
Supports Subject Area(s) of:
Language Arts – e.g. step by step instructions
Mathematics - measuring
Visual Arts
Time Needed for Project:
1 hour plus drying time
Main Materials:
Kunin™ Felt - Light Pink, White, Turquoise, Orange, Fuchsia, Lime Green, Red
EmbossedFelt™ Cashmere Tan
FloraCraft® Styrofoam™ Ball – 2 ½”
Elmer’s® All Purpose Glue
Elmer’s® Permanent Double Sided Tape
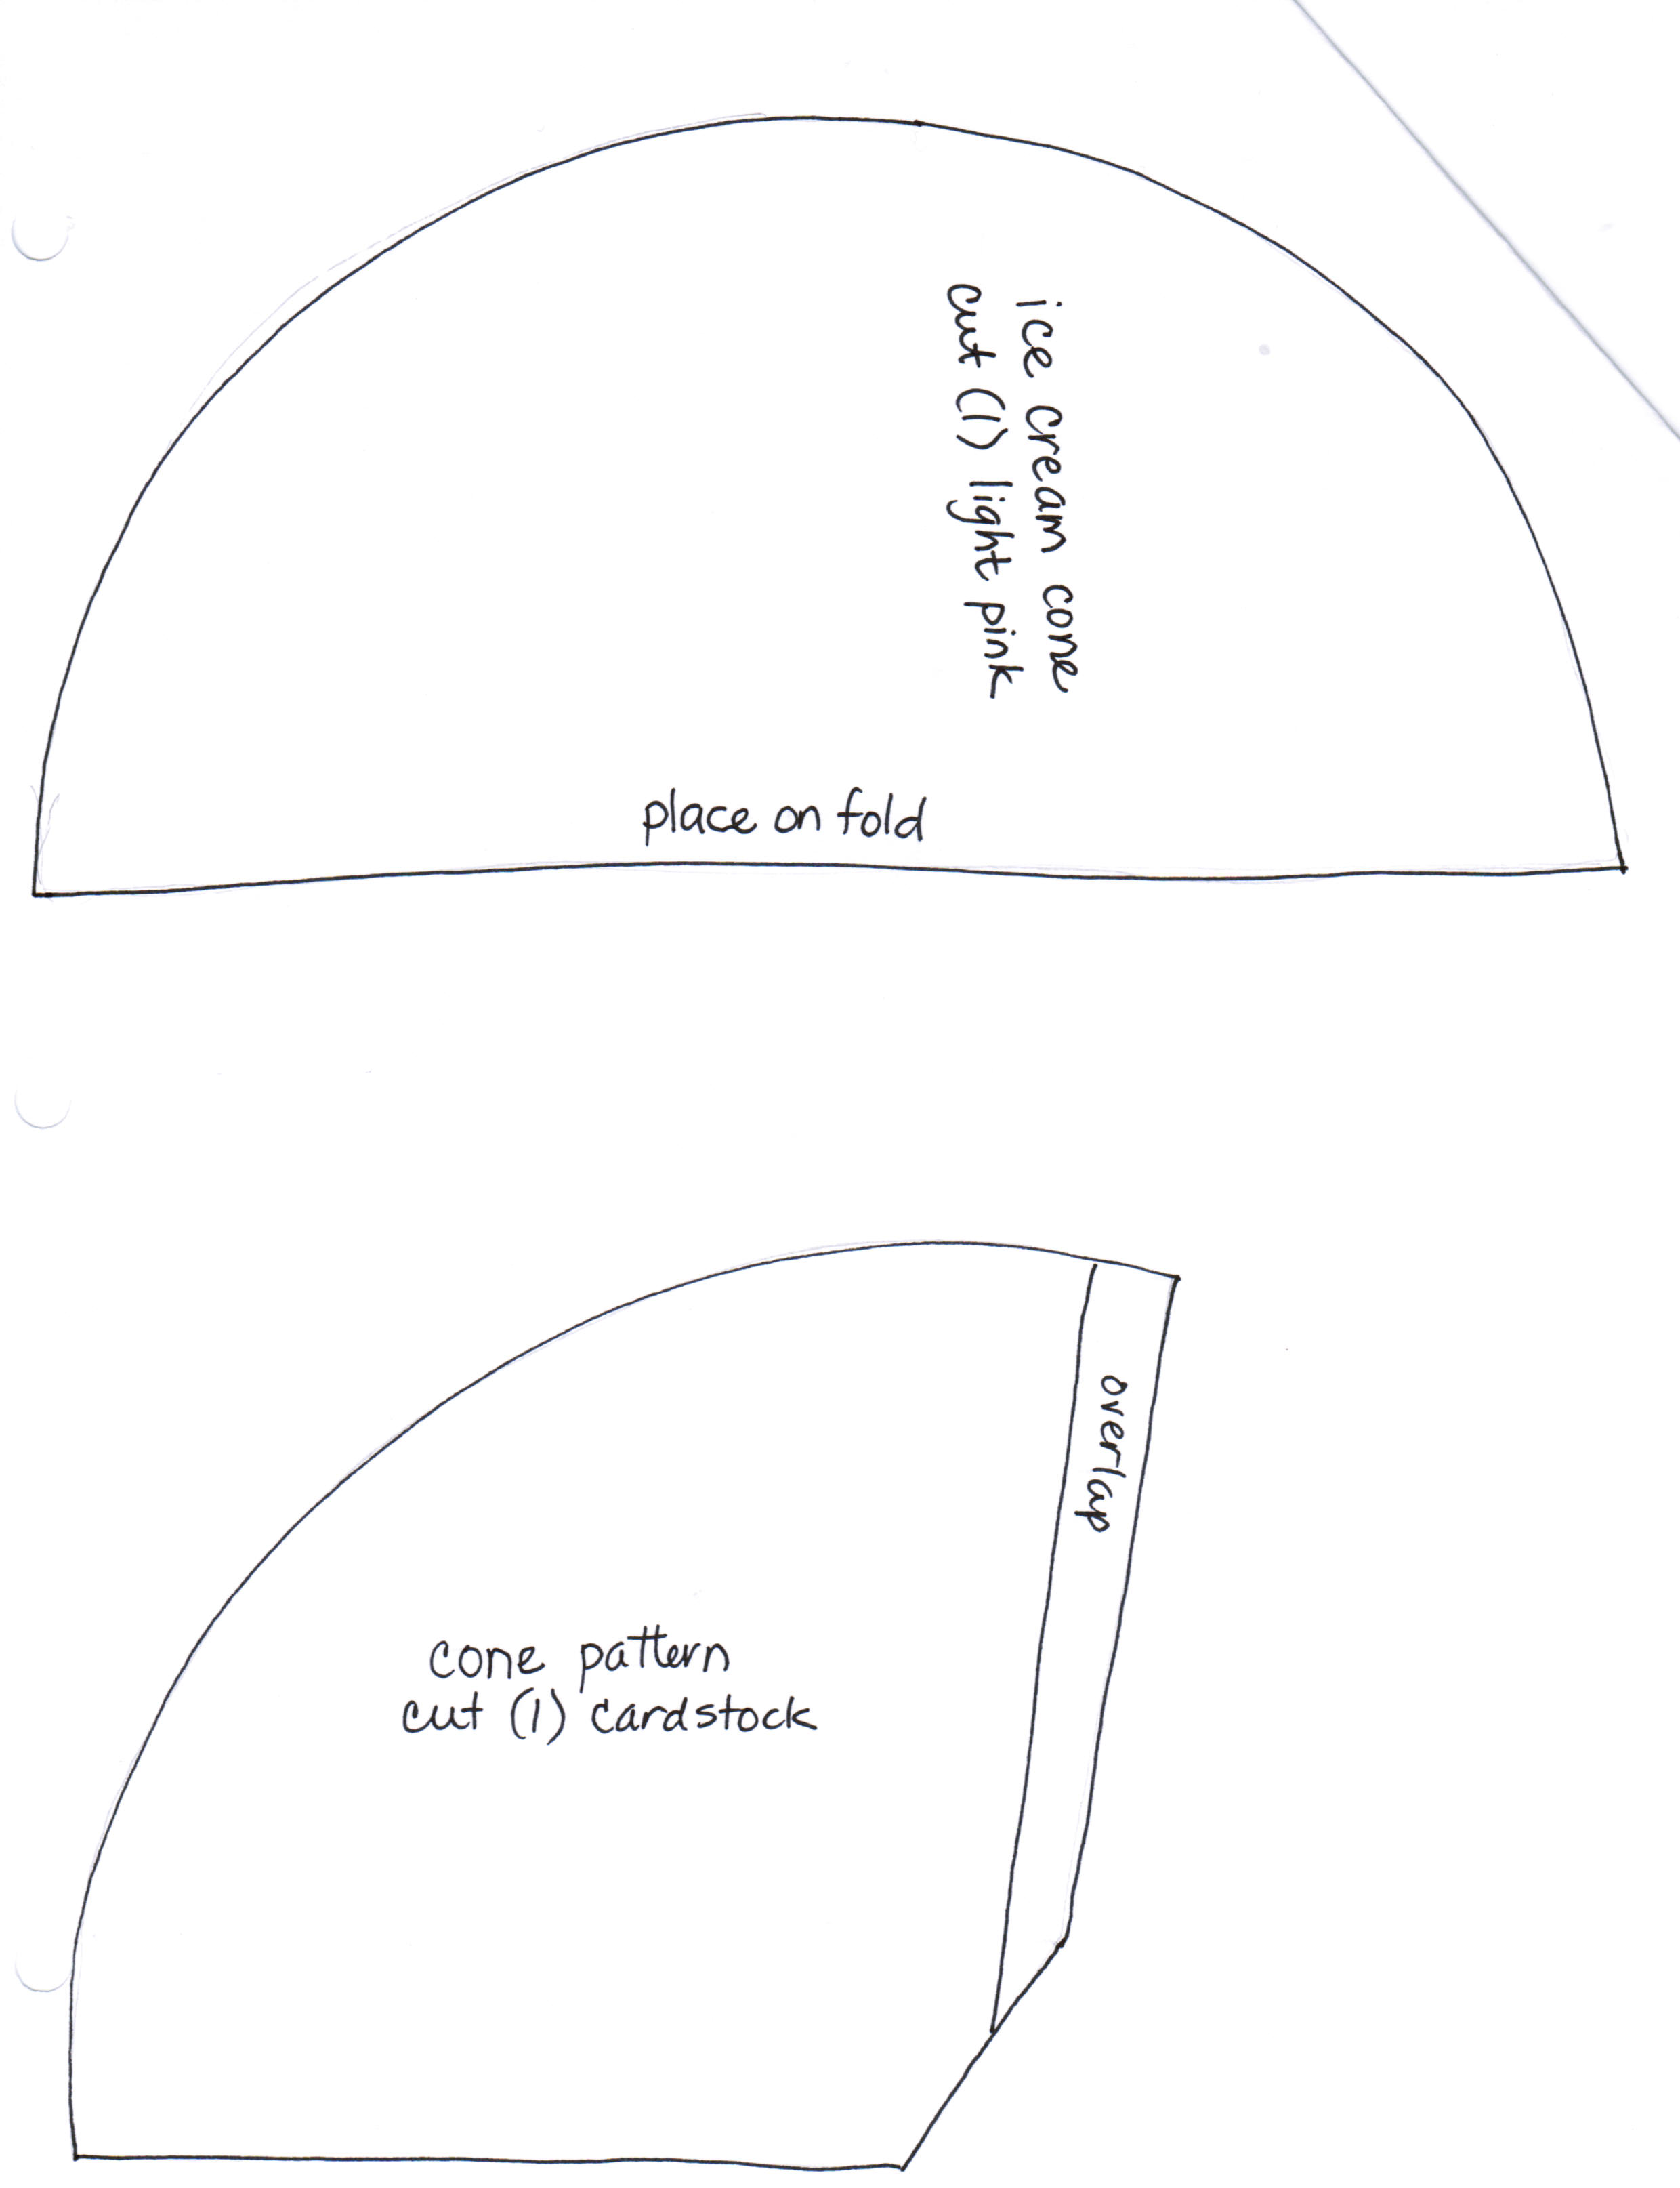
Click here to download the pattern for this project.
Main Materials:
Cardstock – any color
Floss – light pink
Scissors
Pencil
Sewing pins
Sewing needle with large eye
Paper clips
Instructions:
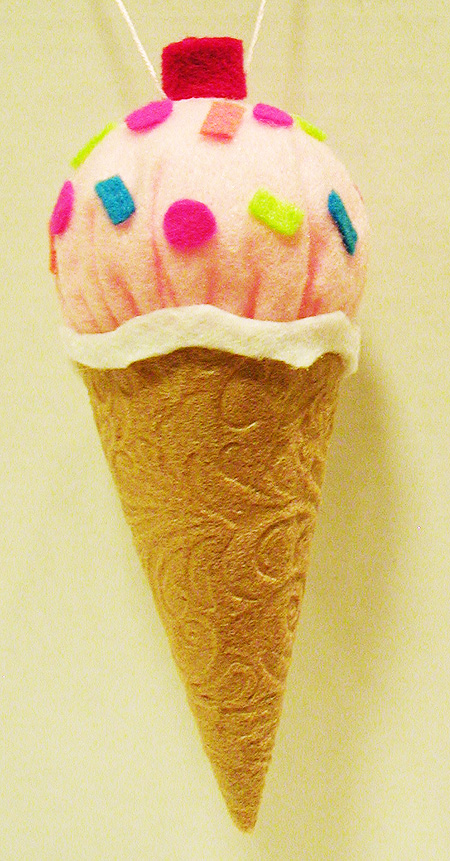
- Cut apart patterns from pattern sheet. Use pencil to trace cone pattern onto cardstock and cut out. Pin ice cream pattern onto fold of pink felt and cut out.
- To make cone easier to form, rub cone shape over edge of table then form cone. Apply glue to inside edge of overlap and press into place holding with small pieces of tape to secure. Let dry.
- To cover cone, apply glue to outside of cone. Press onto tan felt rolling and pressing to secure. Trim sides for a scant 1/4” overlap, then glue into place trimming end as needed to create a point. Sewing pins can be poked into tip if needed to secure till dry.
- Trim felt to 1” above edge of cone then snip in felt about 1” apart around rim. Apply glue around inside rim of cone then fold down snips pressing into glue, holding with paper clips if needed till dry.
- Thread needle with floss and tie knot in one end. Sew a basting stitch about ¼” in around edge, slightly gathering felt. Apply a few lines of glue to foam ball. Press into center of gathered piece then pull gathers tighter. Add more glue to ball then pull gathers tight encasing ball. Tie knot in ends to secure then trim. Pull down gathers to make as smooth as possible on ball. Apply a bead of glue to inside edge of cone then press in covered ball. Let dry.
- Cut wavy pattern from white felt. Glue onto edge of cone trimming ends to fit.
- Cut a 4 ½” x ½” strip of red felt. To create cherry, add a dab of glue at one end then roll up gluing other end in place.
- To create hanger, cut a 10” piece of floss and knot ends together. Add glue to one side of cherry, press knot in glue then press cherry to top of cone where shown.
- Cut small circles from fuchsia felt and small snips from lime, orange and turquoise felt. Glue pieces onto ice cream referring to photo for placement.
|
