|
Age Range: 7 to 12
Grade Range: 2 to 6
Skill Level: Moderate
Appropriate for These Special Events:
Every Day and Rainy Days
Supports Subject Area(s) of:
Language Arts – e.g. step by step instructions
Mathematics - measuring
Visual Arts
Time Needed for Project:
1 hour plus drying time
Main Materials:
FloraCraft® – 8” foam disc
Kunin™ Felt – Walnut (6), Orange
Kunin™ Printzfelt – Brown Dots, Galleria Cashmere Tan (embossed)
Elmer’s® Craft Bond Tacky Glue
Horizon Fuzzy Sticks – Dark
Basic Materials:
Paper cupcake liners – desired color
Small sharp scissors
Water bottle lid (2) white
Buttons – (2) black ½”
Dull pencil
Sewing pins
Foil
Wire Cutters - optional
Patterns for this project:
Pattern 1
Pattern 2
Pattern 3
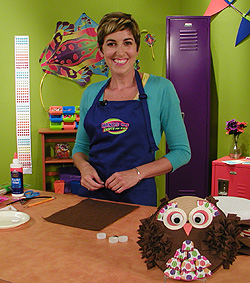
Instructions:
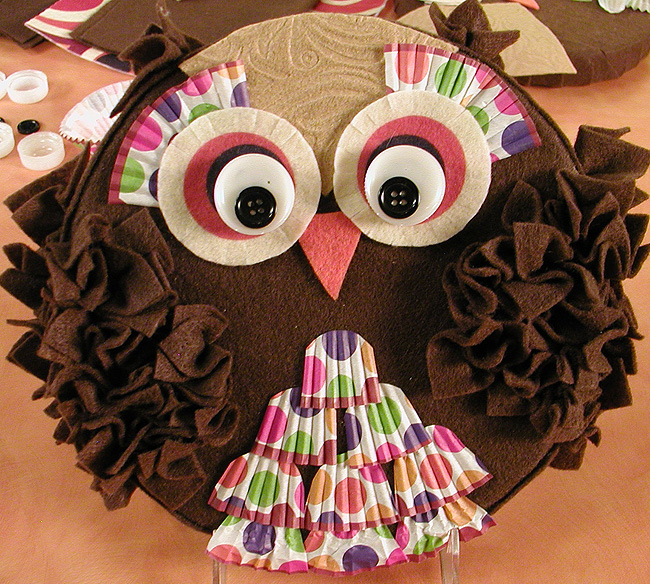
- Cut patterns from pattern sheet. Pin tan pattern to embossed felt, cut out then snip along indicated line. Cut out one beak from orange and backing from brown.
- To cover disc, start by placing long side of brown felt about 2” from top edge of then press another right next to it, butting edges to cover front of disc. Carefully lift one edge of joining pieces and apply a few beads of glue to disc. Press back in place pressing to secure, and then repeat with other section making sure no white shows through. Hold edges together with a few pins till dry.
- Cut excess felt from around disc leaving about a 3” border where possible. To cover edges, start by sniping in along the edge about every 1 ½” or so. Working in sections at a time apply several lines of glue around edge of disc then fold snips up and over to back, pressing into glue adding pins along the way to hold in place. Continue around entire disc adding more glue as needed. Let dry then remove pins.
- To cover back, apply a thin bead of glue around entire edge on one side of felt round. Center on back to cover sniped ends then press to secure.
- Snip in about 1” or so apart around sides of several cupcake liners then cut off bottom section. Slightly curve tops edges of each section. Several can be cut at a time then pull apart.
- The top of owl is where the two pieces meet on front. Position felt piece in place with about an inch overhang to fold down side. Apply glue to back of triangle then press in place overlapping and gluing sniped sections for a smooth fit on side.
- To create eyes, cut two circles from Brown Dot felt piece. Position felt eyes and beak in place as shown then insert two paper pieces under each eye. Glue layers in place.
- Position and glue paper pieces on center of body referring to photo for placement.
- To create feathers, start by cutting a sheet of brown felt into four equal strips lengthwise then each strip into five squares. Remove lid from glue bottle and pour a puddle of glue into center of foil. Start with ears – use tips of sharp scissors to punch a hole through felt on either side of tan section as shown then twisting to create a larger hole. Place tip of dull pencil in center of felt square then pull up sides creating a point at end. Dip point into glue then press into hole inserting about 1/2” or so when possible. To create wings, start by punching five holes about 1” apart along sides. Glue and insert felt squares. Repeat with other side. On top of disc, punch four holes close to edge then three about ½” in from the first then two for the last line. Repeat with other side then add all felt squares.
- To create hanger, use scissors or wire cutters to cut a 4” length from brown Fuzzy Stick. Twist ends together. Use scissors to create a hole toward top on back, add glue to tip, then insert into hole.
- Fill water bottle lids to rim with Tacky Glue. Let dry - this may take overnight depending on weather. Add a dot of glue to back of button then pressing in place referring to photo. Let dry then glue in place as shown.
|