|
Hands on Crafts For Kids is the resource for kids craft projects and instructions for kids 6-12 and parents, teachers and other group leaders. It includes school and curriculum based projects, multi cultural projects, and every day, holiday and seasonal ideas. |
| 1707-3 | Print | Close [X] |
Felt House
|
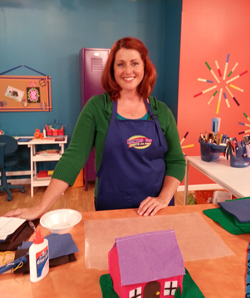 |
Always cover your work surface with a mat or some type of protective covering like wax paper or plastic. Age Range: 7 to 12 Grade Range: 2 to 6 Skill Level: Moderate Appropriate for: Supports Subject Area(s) of: Time needed for Project:
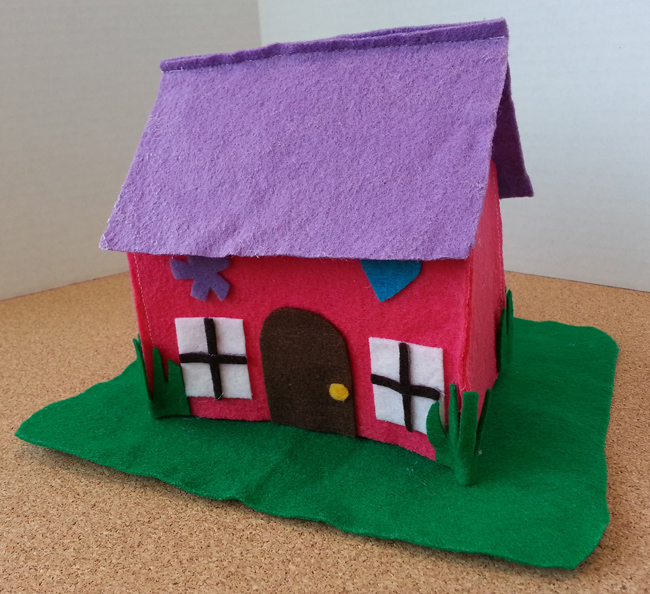
FELT HOUSE Materials needed: 2 - 9x12 inch piece of Classicfelt™ from The Kunin™ Group (color of your choice for the side of your house) Directions: Step One: Creating your Templates Measure and cut out 2 - 4x6 inch pieces of paper (to save time I used 2 pieces of 4x6 inch photo paper or 4x6 file cards). Step Two: Cutting Felt Pieces (2) 9x12 inch pieces of felt in colors of your choice for your house Pattern: (right click here and choose "Save As" to download to your system) Now that you have your templates done you are going to use them to cut out the piece to your felt house. Step One: Take your whole 4x6 inch template and your 4x6 inch template with the cut ends and lay them down on the felt color you have decided on for the sides of the house. Next you can pin the paper onto the felt to hold it still or use clothes pin to hold it in place while you cut. Step Two: cut out 2 - 4x6 inch pieces (these will be the front and back of your house) Then cut out 2 of the 4x6 inch pieces with cut edges (these will be the gable ends of the house) Step Three: Take your whole 4x6 inch template and pin it onto the felt color you have decided on for the roof and cut out 2 - 4x6 inch pieces. (this will be your roof) Step Four: Take your 9x12 inch piece of green felt and just cut the corners off slightly, rounding it a bit. This is your grassy lawn. Stiffening the felt Things you will need to complete this step: Step One: Mix 1/2 cup of glue with 1/2 cup of water in bowl. Mix well until combine. Step Two: Once you have the mixture well mixed and looking smooth take your pieces of felt that you have cut and immerse them one at a time into the glue mixture. Make sure they become completely saturated in the glue mixture and then squeeze them out and lay them as flat as you can on the cookie sheet or wax paper. Do the same with the grassy lawn piece as well. Step Three: Leave the felt untouched until they are completely dry. I try to find a nice sunny spot to put them, so they dry a bit faster. Once they are dry remove them from cookie sheet or wax paper. If you find that your pieces are wrinkled you and put them between two towels and iron over the top of the towels to flatten them. Now you are ready to move onto the next step. Assembling your house Things you will need to complete this Step Step One: Take one gable end (a 4x6 piece with end angles cut off) and a 4x6 piece and sew the to 4 inch sides that match up together. Step Two: Do the same thing as step 1 with your 2 remaining pieces. Now that you have two sets of the same thing we are going to sew them together. Sew the 4 inch side to the 4 inch side until your house is complete without a roof. Step Three: Now take your 2 roof pieces and sew the 2 six inch sides together. You have a roof!! Your house is complete, now to add embellishments! Embellishments Things you will need to complete this step: Step One: Cut out 2 small white squares and one larger brown square. These will be your windows and door. You can also cut out some green grass for the sides of your house or any other little embellishments you may want to add to make it your own. Step Two: Put glue on the back of the windows and put them in place. Do the same for the door and any other embellishments you want to add. Allow to dry completely. Step Four: Add a few felt flowers to your grassy lawn to make it feel like home. YOU’RE DONE!!! Great job, now you have a perfect doll house for your little friends. For more information visit:
|
Our Partners:
|

E-mail questions about Hands On Crafts for Kids to info@craftsforkids.com |