www.craftsforkids.com

Hands on Crafts For Kids is the resource for kids craft projects and instructions for kids 6-12 and parents, teachers and other group leaders. It includes school and curriculum based projects,  multi cultural projects, and every day, holiday and seasonal ideas.

It is  the online home of the public television program Hands On Crafts for Kids.

1707-5 Print | Close [X]

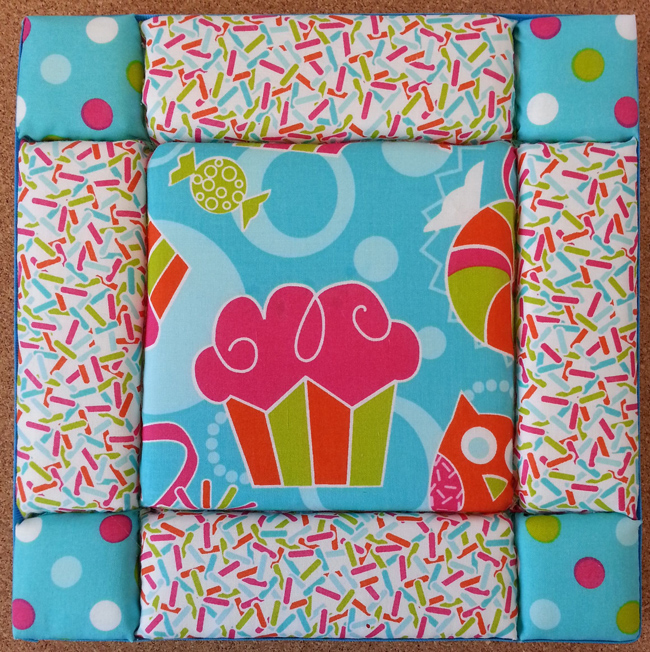
Quilt and Tuck Wall Art


When you see the “helping hand” symbol on a project, it means you may need adult supervision to do the project.

Always cover your work surface with a mat or some type of protective covering like wax paper or plastic.
                                                    

Age Range: 7 to 12

Grade Range: 2 to 6

Skill Level: Moderate

Appropriate for:
Home Décor, Every Day and Rainy Day Activities

Supports Subject Area(s) of:
Language Arts – e.g. step by step instructions
Mathematics - measuring
Visual Arts

Time needed for project:
1 hour, plus drying time for glue


QUILT AND TUCK WALL ART
Designed by:  Dondi Richardson

Materials Needed:
FloraCraft® Foam:
Block: 1.25” x 10” x 12”
Other Materials:
Fabric Squares: (3) Coordinating Colors
Thin Quilt Batting
1.25” Wide Ribbon
Tools:
Make It: Fun® Foam Cutter or Serrated Plastic Knife
Make It: Fun® Foam Tools
Elemer’s® Glue-All®
Scissors
Black Marker
Ruler


Directions:

  1. Use the foam cutter or plastic knife to cut 2” off the foam block to create a 10”x10” block.  Set aside the 2” piece for a future project.  Measure 2” in from each corner of the 10”x10” square and make a mark.  Use the ruler as a guide and draw intersecting lines from mark to mark creating your template.  It should look like the drawing above.
  2. Use the scribe tool from the foam tools.  Use the rounded end and the ruler as a guide to slightly indent the foam along the marker lines.  Now use the tuck tool (pointed end of the tool) and the ruler as a guide to create a channel down the center of the scribed lines.  This channel will make it easier for the fabric to tuck in.
  3. Cut pieces of batting to fit inside each section of the template.  Cut the batting pieces about ¼” smaller than the template sections.  Be sure not to cover the channel with batting. 
  4. Cut four 7”x3” pieces of fabric for the four side sections.  Cut four 3” x 3” squares of fabric for the corners and cut one 7” x 7” square for the center.
  5. Starting with the outside blocks, lay the first piece of fabric over the coordinating section of batting on the foam sheet.  Begin tucking the fabric into the channel on the three sides using the tuck tool. Wrap the fabric around the outside edge of the foam square and glue to the side of the sheet, making sure the fabric lays flat against the side.
  6. Continue tucking the fabric pieces around the outside and finish by tucking in the center fabric piece.
  7. Cut a piece of ribbon to cover the outside edge of the foam square and glue in place.
  8. Use the ribbon to make a loop hanger.

Skill Level: Beginner


Our Partners:


www.elmers.com
www.makeitfuncrafts.com