Age Range: 7 to 12
Grade Range: 2 to 6
Skill Level: Moderate
Appropriate for:
Home Décor, Gifts, Every Day and Rainy Day Activities
Supports Subject Area(s) of:
Language Arts – e.g. step by step instructions
Mathematics – measuring
Time needed for project:
1 ½ hours, plus drying time for glue
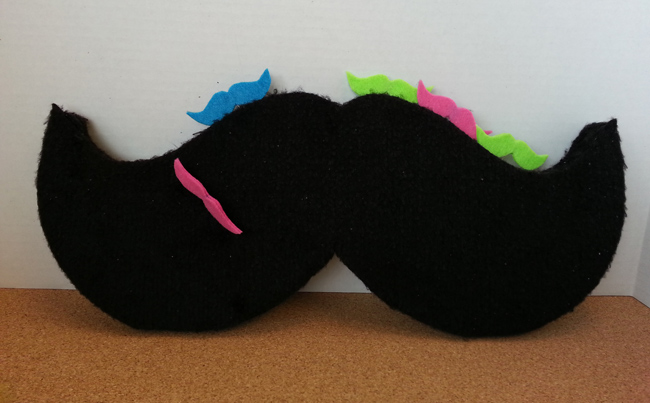
MUSTACHE MEMO BOARD
by Cheryl Ball
Materials Needed:
Floracraft Foam: 1” thick sheet
The Kunin™ Group - Shaggyfelt™ – black
The Kunin ™ Group Clasicsfelt ™sheets – turquoise, lime, hot pink
Elmer’s® Glue-All®
Scissors
Flat head quilt pins
Black chenille stem
Sewing pins
Cellophane tape
Scratch paper
Pencil
Permanent felt pen
Wire cutters
Foil
Plastic serrated knife
Pattern:(right click here and choose "Save As" to download to your system)
Directions:
- Cut pattern along fold line. Tape two sheets of scratch paper together at ends creating one long piece. Fold paper in half then place pattern on fold line. Use pencil to trace around pattern then cut out.
- Place pattern on foam sheet and trace around with marker. Use serrated knife to carefully cut out.
- The felt has a nap – place Shaggyfelt, right side down on work surface. Pin pattern in place, cut around pattern adding an extra ¼” or so around entire pattern then repeat step creating two.
- Cut 1” wide strips from remainder of felt this will be used to cover sides of board. Working in sections, apply a bead of glue along both edges. Press felt strip into place holding with sewing pins as needed. Cover entire edge of board, trimming and butting ends together as needed.
- Squeeze a puddle of glue onto foil. Use plastic knife to lightly “frost” glue onto 1/2 of top surface. Press felt into place then glue on other half then glue other felt piece to back side of board.
- Use wire cutters to cut chenille stem in half. To create hangers, bend one section in half then twist ends together about ½’ or so from bend. Create two. Bend 90 degrees after loop.
- Determine placement of hangers then use tip of scissors to snip into felt then use ends to poke hole into foam through snip. Apply glue to end of hanger and insert into hole.
- To create pins, pin small mustache pattern onto felt sheet and cut out. Each pin needs two – cut out desired number.
- Apply glue to one side of mustache, press flat head pin at center then press other piece into place. Press together, let dry then trim as needed.
|