Age Range: 7 to 12
Grade Range: 2 to 6
Skill Level: Moderate
Appropriate for:
Parties, Every Day and Rainy Day aCtivities
Supports Subject Area(s) of:
Language Arts – e.g. step by step instructions
Visual Arts
Time needed for project:
1 hour
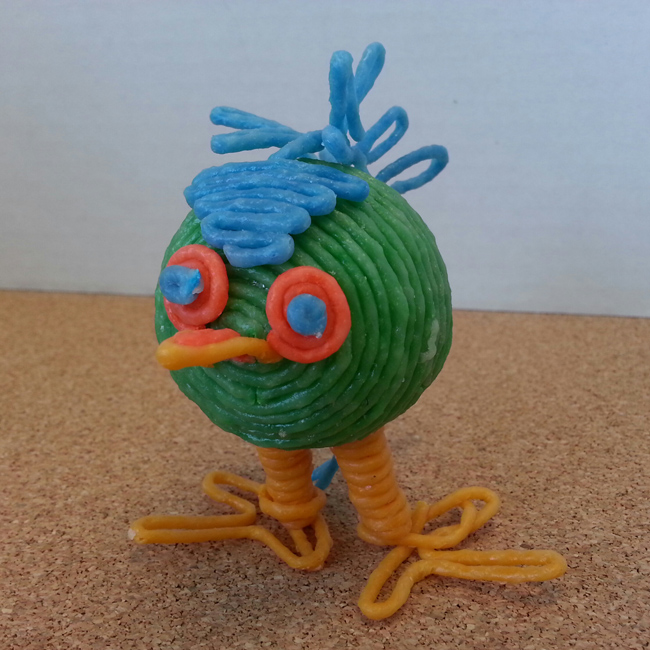
FOAM BIRDIE and PENCIL TOPPER
by Nikia Bradley
Foam Birdie
Materials Needed:
FloraCraft® Foam – 2” ball
2 toothpicks
Wikki Stix® – various colors
Scissors
Directions:
Step 1
Begin by pinching over an end of the Wikki Stix on itself and begin coiling it around in a circle. Once you get a good start (quarter size) press it firmly onto the ball and continue coiling it around the ball. It takes a few inches into a 4th Stix to cover the ball. When 1 Stix is completely used, lay the next Stix to the previous and continue until the foam ball is covered and snip the end with scissors to finish off.
Step 2
Pick a “leg” color and wrap the bottom ½ of the toothpick from the tip up toward the middle then back down toward the tip. Make a small loop, medium loop and another small loop to resemble the bird’s toes. Secure the loops by pressing the ends firmly onto the bottom of the leg. Take the finishing end and wrap around the top of the foot to secure. Cut the Stix toward the back of the leg to hide the end. Press the exposed toothpick into the body of the bird. Repeat for 2nd leg.
Step 3
Add details. 1 wing is done. Use the orange and yellow to create 2nd wing. Spread the layers of the 2 colors to add dimension. 2 large pink circles are for the bottom layer of eye, the 2 smaller yellow circles are the “pupils”. Layer these and attach to the body. Use the pink to add a zig-zag or “feathers” running down the back. Press the red/yellow beak into place. Press the sticks firmly onto the bird to make them stick. When complete, firmly press down on the bird and the loops of the feet onto the table to make the bird stand on its own.
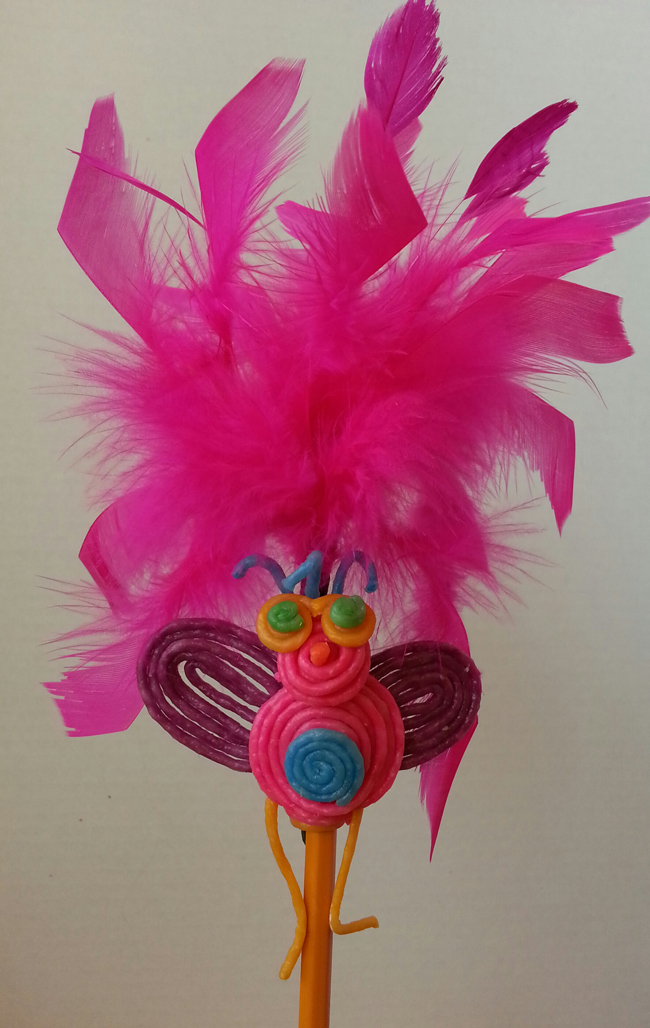
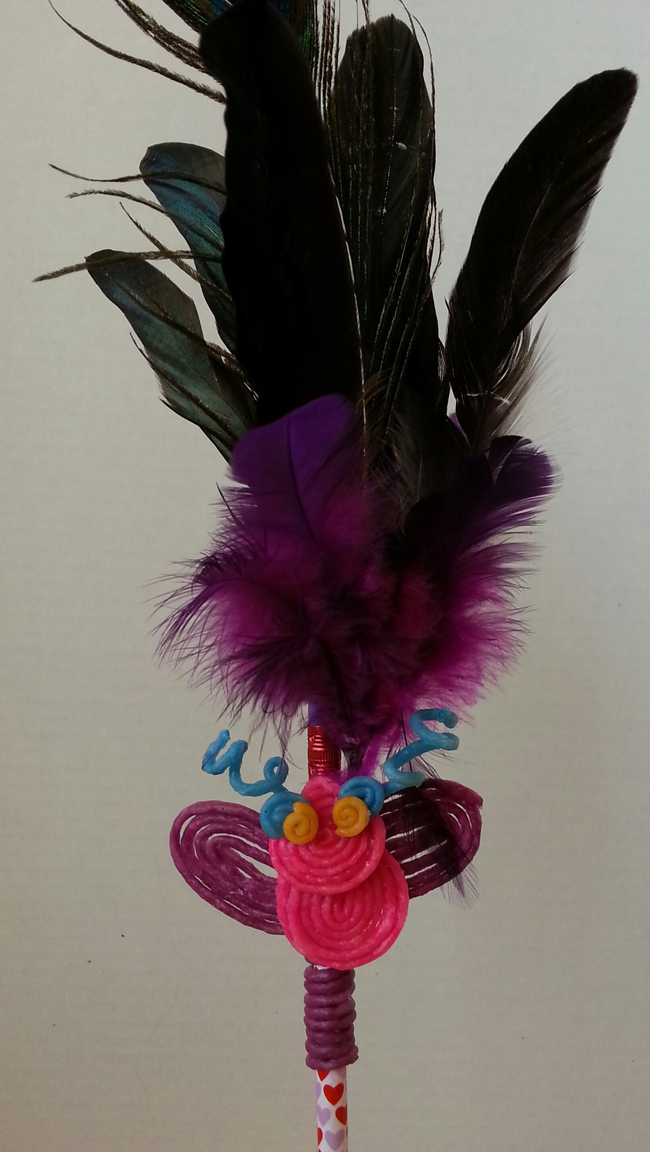
Pencil Topper
Materials Needed:
Wikki Stix® – various colors
pencil
FloraCraft® Design It:® SimpleStyle® feathers
wire cutters
scissors
Directions:
Step 1
Size the wire piece on the pencil and cut the wire to the point where you will wrap around the Wikki Stix so the end can be hidden. Place the feather on the pencil and wrap a Stix to connect the 2 together. Cut the end of the Stix with the scissors.
Step 2
Use techniques in Foam Birdie to create a creature. I created a bird, the wings are complete, use the extra space between the wings to wrap around the pencil and attach the rest of the creature to the pencil. Press all pieces firmly. If you rub your finger over 2 attaching pieces the motion and warmth seem to create a tighter seal. |