Age Range: 7 to 12
Grade Range: 2 to 6
Skill Level: Moderate
Appropriate for:
Make Believe, Camp, Every Day and Rainy Day Activities
Supports Subject Area(s) of:
Social Studies
Science
Language Arts – e.g. step by step instructions
Visual Arts
Time needed for project:
1 hour, plus drying time for paint and glue
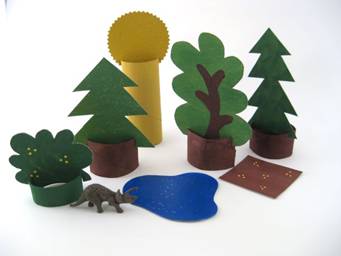
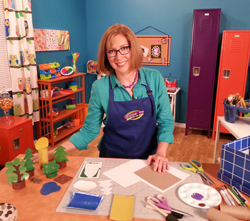
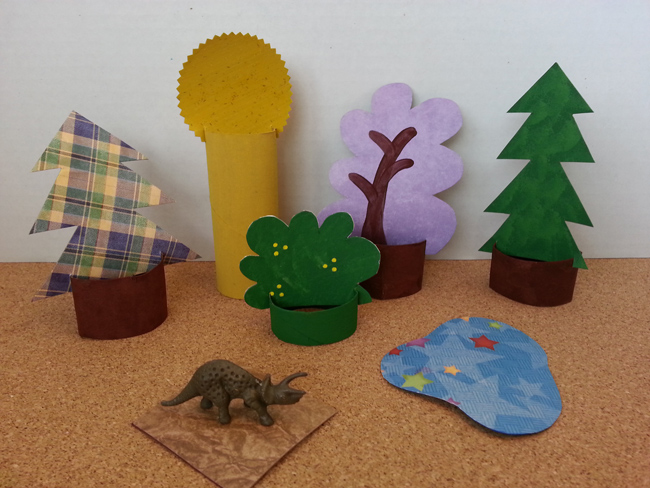
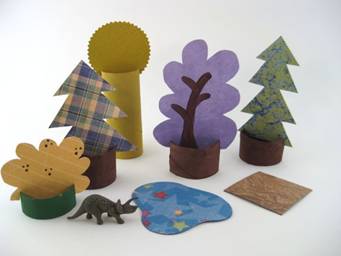
Paper Playscape
by Katie Hacker
Materials Needed:
Assorted Hot Off The Press patterned paper
Acrylic paint: blue, brown, yellow, 2 shades of green
Elmer’s® Washable School Glue Stick
Elmer’s® Classic Glitter Glue: Green, Yellow, Blue
Elmer’s® Yellow Painters® Marker
Foam paintbrushes for paint and glitter glue
Round paintbrush
Cereal box
2 toilet paper tubes
Shapes: Print out patterns for trees & pond; lid/pinking shears for sun
 Pencil Pencil
Scissors
Pattern: (right click here and choose "Save As" to download to your system)
Directions:
- Cut out the paper patterns.
- Cut one toilet paper tube into three pieces, cut a small section off of the other tube. Paint the short toilet paper tube green, paint three medium sections brown and paint the tall tube yellow.
- Cut the cereal box into rectangles that are slightly larger than the pattern shapes.
- Use a glue stick to glue the cereal box rectangles to patterned paper.
- Paint the tree/bush rectangles green, the pond blue, the sun yellow and the flower patch brown.
- When the paint is mostly dry, brush matching glitter glue onto two trees, the pond and the sun.
- When all of the pieces are dry, place a pattern over each piece of cardboard and cut around the pattern.
- For the sun: hold a lid on the cardboard and cut around it with pinking shears.
- Add embellishments: Use the foam brush to pat the other color of green onto a tree and bush, use a yellow paint pen to make berries on the bush and flower patch, use a round brush to add limbs to the tree.
- On the trees, bush and sun, place the top edge against a toilet paper tube and use a pencil to mark where the notches should be. Cut out the notches.
- To attach the trees, bush and sun to the tubes, slide the notches over the top edges of the tubes.
For more information visit:
www.katiehacker.com
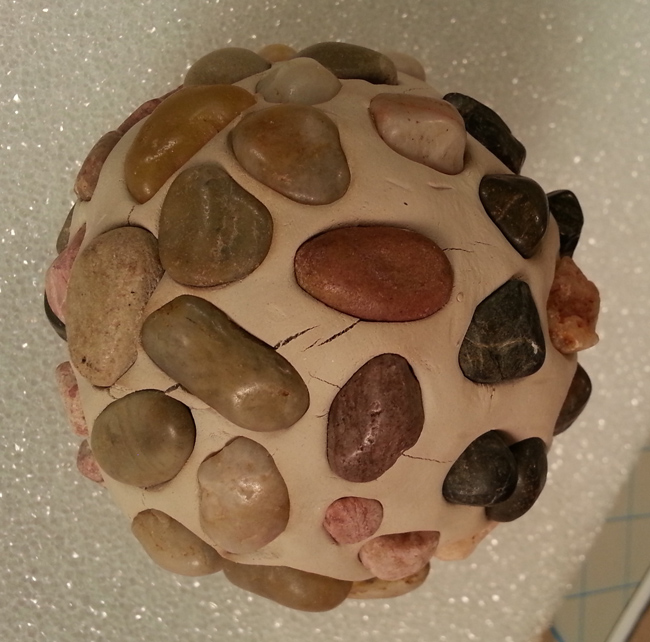
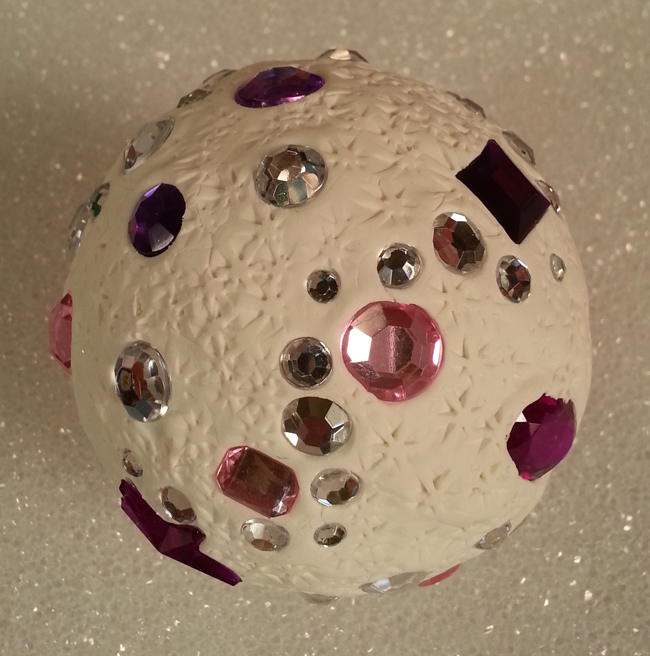
Mosaic Glass Garden Ball
By Jennifer West
Materials Needed:
FloraCraft ®Foam: 3” ball
ACTIVA® Activ-Clay™
Elmer’s® School Glue
Mosaic glass tiles of different colors
Newspaper and wax paper
Clay roller or old rolling pin no longer used for food
Directions:
1. Cover your workspace with newspaper with wax paper on top.
2. Roll clay until it is flat, like you are making a pizza crust. Once flattened, place it over the foam ball and use your fingers to smooth it out and completely cover the ball.
3. Dap a small dot of glue onto a mosaic tile and then press it into the clay. Try and press down and let the clay surround the tile. Do this until the ball is covered with as many tiles as you like. (You can also use colored stones or pebbles from a river.
4. Allow 24- 48 hours for the clay to fully harden and then cover it with a mixture of half water and half white glue before you place your new creation outside in the elements.
For more information visit:
www.pinkwhen.com
|