Age Range: 7 to 12
Grade Range: 2 to 6
Skill Level: Easy to Moderate
Appropriate for These Special Events:
Pretend Play, Every Day and Rainy Days
Supports Subject Area(s) of:
Language Arts – e.g. step by step instructions
Mathematics - measuring
Visual Arts
Time needed for project:
1 hour plus glue drying time
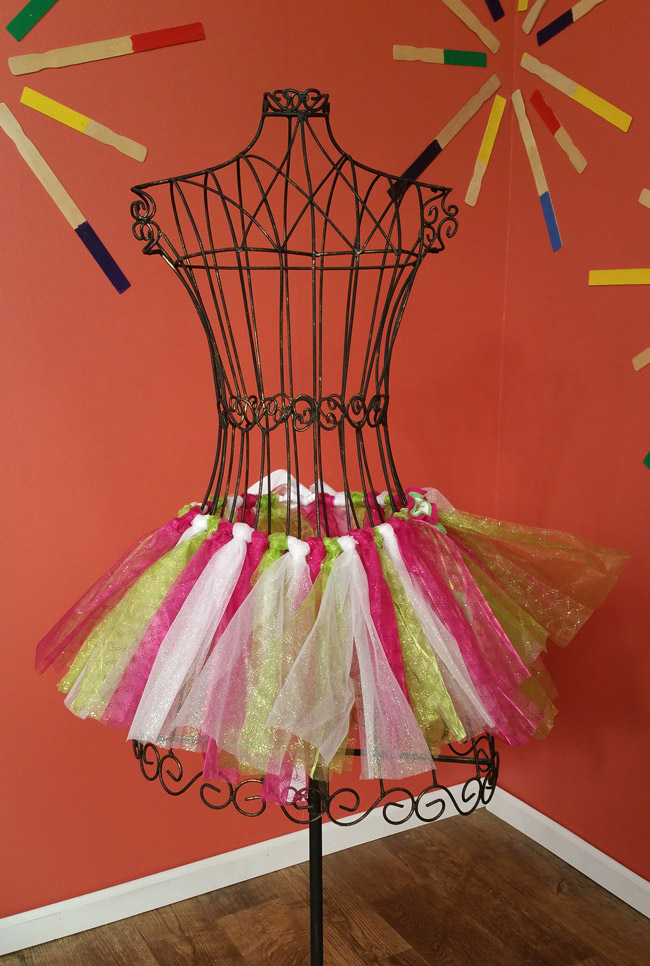
Sparkling Tutu
Designed by Lisa Galvin
Main Supplies:
*3 yards Grosgrain Ribbon, 1 ½” wide
Elmer’sÒ Classic Glitter Glue Pen, gold
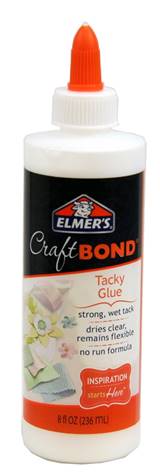
Elmer’sÒ CraftBondÒ Tacky Glue
*FloraCraftÒ: Design ItÒ SimpleStyleÒ Three – 6” x 10 yard spools
Glittered Organza, Color of choice. (Used here: White, Fuchsia Lattice & Green Lattice)
The Kunin™ Group 9” x 12” Craft Cuts Eco-fi® Classicfelt™ sheets: Neon
Lime, Fuchsia, White
24” length 1/8” wide Neon Lime Ribbon
Basic Supplies:
Fine tip black marker
Scissors
Ruler
Optional: Broom handle, clothespins
*May vary based on waist size.
Tip:
When selecting multiple colors for your tutu, it is sometimes hard to determine the color pattern that you want. One quick and easy way to do this is to start by looping your Glittered Organza lengths around a clean broom handle or dowel rod. Slide them easily to add new colors or remove others. Once you have the perfect color pattern, simply slide the lengths off the end of the broom handle and slip them onto your ribbon in the same order, then pull to cinch tightly to the ribbon.
Directions:
1. Determine length of grosgrain ribbon needed by first measuring waist. Add 60” to waist measurement and cut ribbon to correct length. Measure 30” from one end; fold ribbon in half at this point and make a knot. Repeat on opposite end. Length between the two knots should equal your waist measurement. The 30” ends on each side will be used
to tie a beautiful bow at the back of your waist once completed.
2. Before you begin skirt: Skirt length may vary and may need to be adjusted based on height. For best results, tie grosgrain ribbon waistband around waist and measure from top of band to desired length. Double this measurement and cut a test piece of FloraCraftÒ organza, folding it in half and slipping over waistband until satisfied.
For tutu skirt as shown here: As needed to fill skirt, cut 24” lengths of each color of FloraCraftÒ organza. Determine what pattern or color repeat you prefer on the tutu. (See tip above!). One at a time, fold 24” lengths in half, slip looped end behind folded center section of grosgrain ribbon waistband, bring ends around front of ribbon and through the loop. Pull to make snug; moving toward one end of the waist knot before fully tightening. Repeat, rotating colors per your preference and moving each FloraCraftÒ organza section next to the previous piece before tightening. Fill entire length between the waist knots. Skirts’ fullness is determined by how tightly the FloraCraftÒ organza sections are pushed together. Once finished, set aside.
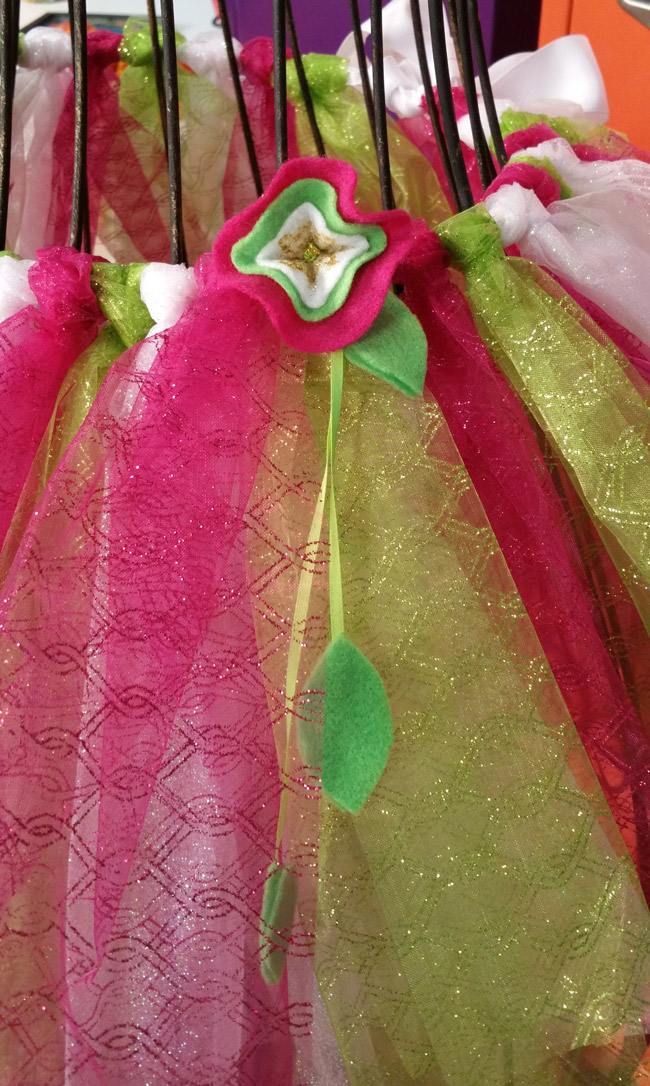
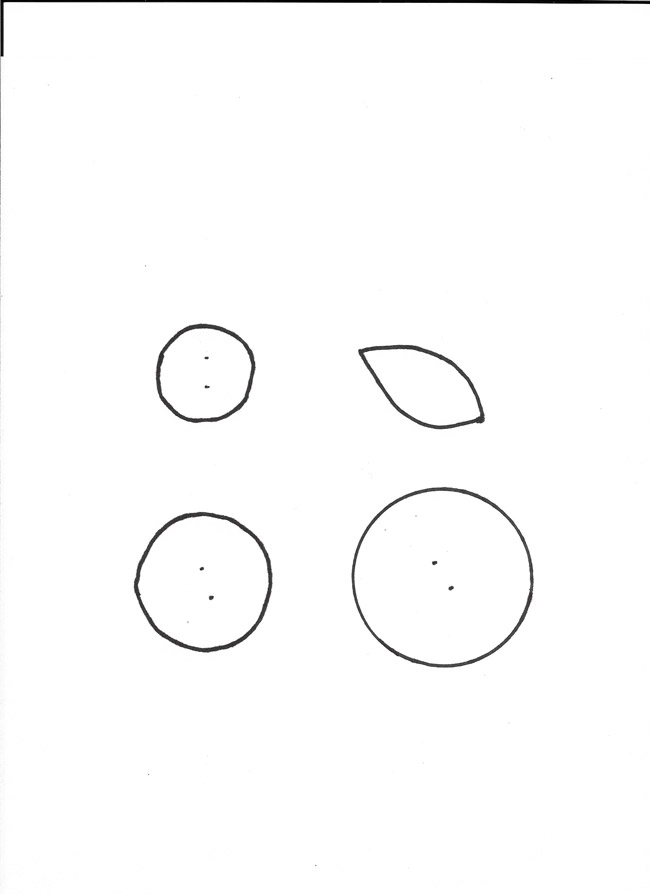
3. For flower bow accent, trace provided patterns onto felt. As shown here, cut one large circle from fuchsia felt, one medium neon lime circle, and one small white circle. Cut six leaves from neon lime.
4. One at a time, fold each circle in half and cut a small slit where indicated on pattern. If you have a fabric hole punch, you can use it instead to punch holes instead of slits. Make an angled cut near one end of neon lime ribbon to create a point. Largest to smallest, thread ribbon point through each felt circle, then back again through opposite slit on each. Pull ribbon ends to even out. Tie an overhand knot at looped end of ribbon, allowing a small portion to extend above the smallest (white) circle. This will become your flower stamen.
5. Apply a thin coat of glue to back sides of medium (neon lime) and smallest (white) circle and push circles together. Tie a knot on back (bottom) of largest (fuchsia) circle.
Pull ribbon ends downward, pinching circles together to create what resembles a flower. Use gold glitter glue pen to apply a few dots of glue at center of flower. Pinch again to disperse the color. For a tighter flower, hold pinched flower together using clothespins and let dry.
6. Make a knot at neon lime ribbon ends. Apply a thin coat of glue to back of leaves and press two together, with knotted ribbon ends sandwiched between them. Repeat for remaining knotted end and at one or more other points on the ribbon strand. Let dry.
7. Tie flower accented ribbon onto waistband of tutu.
|