|
Age Range: 7 to 12
Grade Range: 2 to 6
Skill Level: Easy
Appropriate for These Special Events:
Every Day and Rainy Days
Supports Subject Area(s) of:
Language Arts – e.g. step by step instructions
Mathematics – measuring
Time needed for project:
45 minutes plus drying time
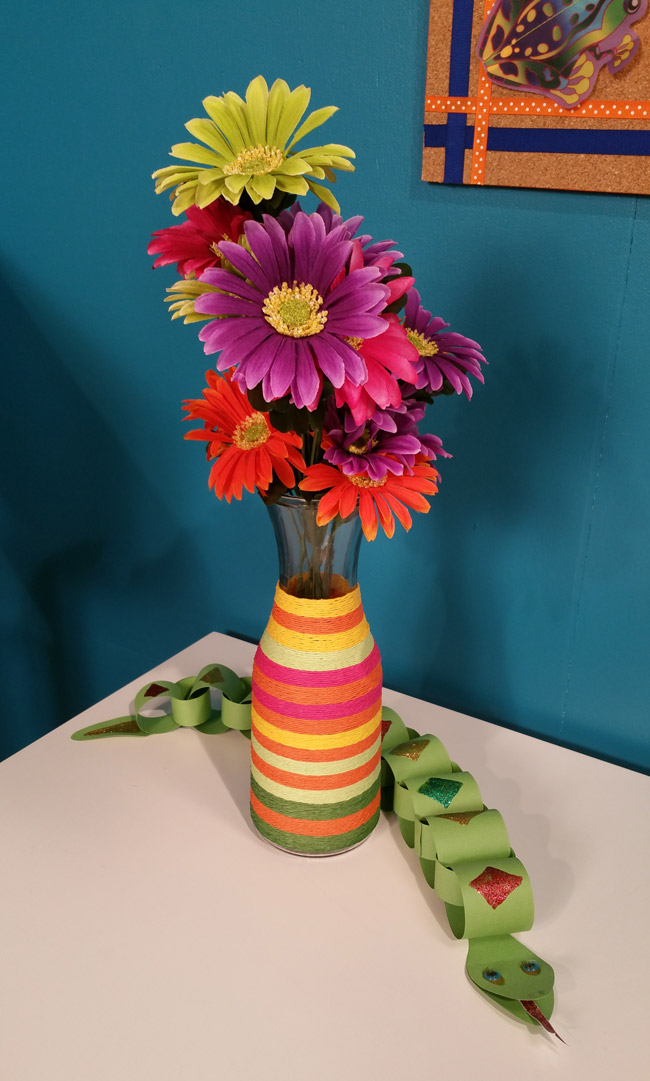
PAPER SNAKE
Designed by Cheryl Ball
Materials Needed:
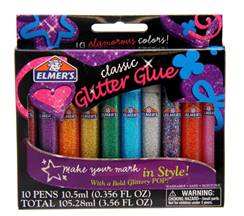
Elmer’s® Craft Bond Tacky Glue
Elmer’s® Classic Glitter Glue Pack
Basic Supplies:
Green Cardstock – (3) 12” square, scrap of white
Wiggle Eyes – (2) ½” turquoise
Scissors
Pencil
Ruler
Clothes pins
Patterns
Directions:
- Measure and cut the following strips from green cardstock: (4) 2” strips, (3) 1 ¾” strips, (1) 1 ½” strip, (8) 1” strips. Fold each strip in half then cut creating 6” long pieces. (If using other size paper, you need: 8-2”x6”, 2-1½”x6” and 16-1”x6”)
- Cut patterns from pattern sheet then trace onto green cardstock, tracing and cutting number indicated on pattern.
- Body – Tip: pass strip over edge of table to slightly curl paper. Roll each wide strip and one 1” into a ring, apply a thin bead of glue to one end then press other end in place overlapping about ¼”. Hold with clothespins till dry. Use the 1” strips to join rings together in following order: (1) 1 ¾”, (4) 2”, (2) 1 ¾”, 1 ½”, 1”. Glue with ¼” overlap and hold with clothespins till dry.
- Tail – squeeze a triangle of Gold Glitter Glue into center of tail.
- Head – Cut out eyes from pattern then use pencil to lightly trace onto one head shape. Fill in eyes with Gold Glitter then press in wiggly eyes. Add small Silver dots for nostrils. Cover entire tongue with Red Glitter. Let dry. Glue tongue plain head section. Apply glue to back of detailed head just behind eyes to neck. Press onto lower section and let dry. Bend back as shown when dry.
- Detail rings with diamonds of Glitter Glue as shown. When dry glue on head and tail.

|