Age Range: 7 to 12
Grade Range: 2 to 6
Skill Level: Moderate
Appropriate for These Special Events:
Pretend Play, Every Day and Rainy Days
Supports Subject Area(s) of:
Language Arts – e.g. step by step instructions
Mathematics – measuring
Time needed for project:
2 hours
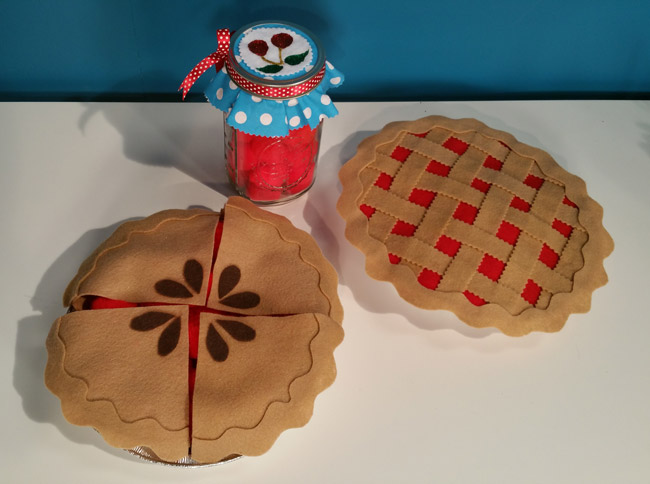
CHERRY PIE, LATTICE TOP, JAR OF CHERRIES
Designed by Cheryl Ball
Materials needed:
Elmer’s® Craft Bond® Tacky Glue
Elmer’s® Classic Glitter Glue - 5 pack
The Kunin™ Group Eco-fi® Classicfelt™ yardage – 1/2 yard – tan
The Kunin™ Group Eco-fi® Classicfelt™ sheet - brown, red, white
Basic Supplies:
Scissors
Ruler
Pencil
Pinking shears
Aluminum foil pie plate
Sewing pins
Ribbon – 24”
Fabric – 8” sqaure
Wide mouth canning jar, ring and lid
Clothespins
Scotch tape
Patterns
Instructions:
Pie:
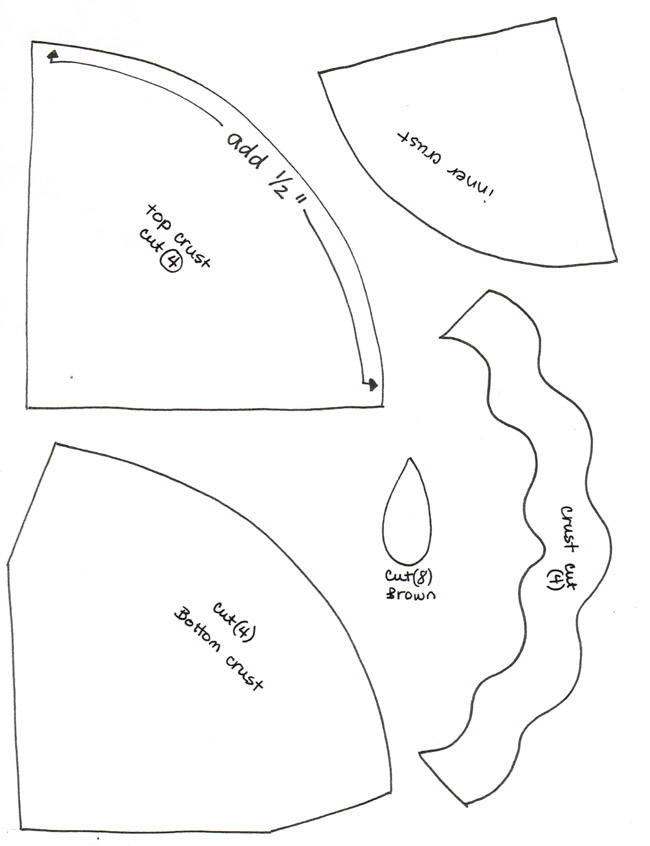
- Cut out all pattern pieces, pin to tan felt and cut out number indicated on pattern. Cut tear-drops from brown felt. Note: Pin upper crust to felt and cut out along straight side, add ½” along curved side. Before removing pattern, snip along curved edge about ½” apart to edge of pattern. Remove pattern.
- Position and glue inner crust to one side of bottom crust. Flip over then position curved section of bottom crust just under snipped edge of top crust. Apply a ¼” wide bead of glue along curved edge of bottom crust then press snipped sections into glue holding with clothespins till dry.
- Glue tear-drops to points of top crust as shown, making sure that inner crust is inside of each slice. Glue wavy crust piece into place along curved edge having about half extend over edge.
- Position pieces into pie tin, making sure inner crust curved edge is flush against side of pie plate.
Fill will pom poms – lining up about 4 toward back then adding three then two. Add more as needed to fill in top crust.
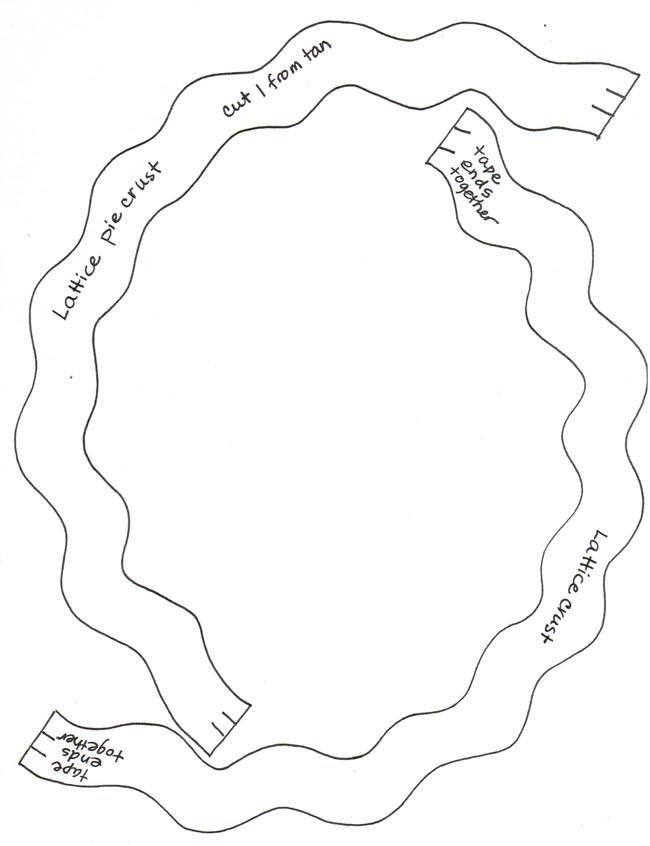
Lattice Crust: This is placed over original pie crust for a different look.
- Use pencil to trace around pie tin on red felt then cut out.
- Measure and draw nine 1” strips of tan felt then cut with pinking shears.
- Starting in center, position strips about 1” apart on red circle then place strips across. Weave strips together adding dots of glue at over laps. When dry cut off excess strips.
- Cut out pie crust patterns then tape together where indicated to form circle. Pin and cut from tan felt.
- Position over woven strips and glue in place.
Canning Jar of Cherries:
- Use pencil to trace around inside of jar ring on white felt. Using pinking shears cut out circle slightly inside pencil line.
- Use Glitter Glue to create Red Glitter Dots for cherries, Gold Glitter for stems and Green Glitter for leaves. Let dry.
- Measure and cut a 7 ½” circle from fabric using pinking shears. Fill jar with pom poms, add jar lid then center fabric in place. Screw on jar lid. Glue felt design in center of lid and tie ribbon around ring.
|