www.craftsforkids.com

Hands on Crafts For Kids is the resource for kids craft projects and instructions for kids 6-12 and parents, teachers and other group leaders. It includes school and curriculum based projects,  multi cultural projects, and every day, holiday and seasonal ideas.

It is  the online home of the public television program Hands On Crafts for Kids.

1901-1 Print | Close [X]

TRINKET BOX

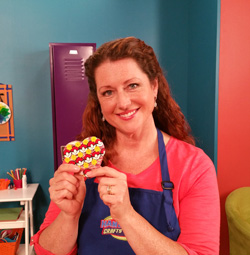
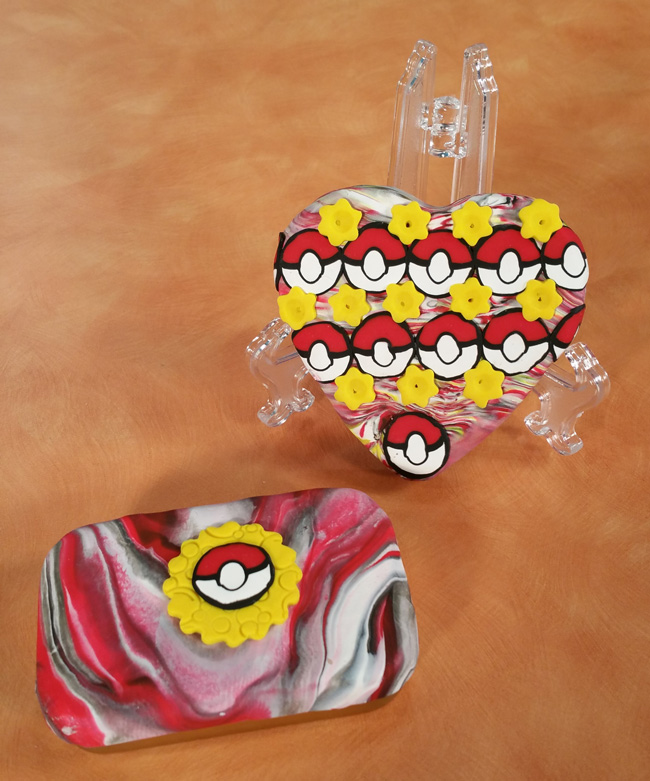
Jenny Barnett-Rohrs makes a trinket box inspired by a popular video game.

Watch the video for this project online at:
https://youtu.be/exafOaOwHJ4


Hosts:
Jenny Barnett Rohrs

When you see the “helping hand” symbol on a project, it means you may need adult supervision to do the project.


Always cover your work surface with a mat or some type of protective covering like wax paper or plastic.
                                                    
Always use care when using tools or a heat source. Be careful and safe!


Age Range: 7 to 12

Grade Range: 2 to 6

Skill Level: Moderate

Appropriate for These Special Events:
Every Day and Rainy Days

Supports Subject Areas of:
Language Arts – e.g. step by step instructions
Mathematics - measuring
Visual Arts

Time needed for project:
1 ½ hours plus baking and cooling time

Polymer Trinket Box

You can “collect them all” in this trinket box inspired by a popular video game. All it takes is a recycled candy tin and some polymer clay and you are good to “Go!”

Materials:

  1. Sculpey® polymer clay in red, black, yellow and white
  2. Candy or mint tins, washed and dried
  3. Small cookie or fondant cutters
  4. Polymer clay tools like a clay cutter, rolling pin
  5. Waxed paper

Directions:

  1. Condition and warm the clay by kneading each color separately.
  2. Roll an entire block of red into a big ball, then roll it into a stout log shape 1 1/2 inches in diameter or so and 3 inches long. Do the same for the white clay.
  3. Using a polymer clay cutter, slice each log in half lengthwise so you have 2 “D” shaped pieces. Set aside one red half and one white half.
  4. Using a clay roller, form the white and red “D” shaped pieces of clay so that they resemble a “C.” Try to keep the length of clay at about 3 inches.
  5. From the remaining white half, pinch a ball of clay and roll it into a long about 3 inches long and the diameter of a pencil eraser. Set aside.
  6. Condition and roll the black clay (about half the block.) Roll it so the sheet is about the thickness of a nickel. Cut a strip about the 3 inches wide.
  7. Wrap the small white log of clay in the black sheet- cut off excess so that it’s an even thickness all the way around.
  8. Place the wrapped log in the valley of the white “C” of clay. Smooth it together so there aren’t any air bubbles.
  9. Cut 4 strips of black clay 3” long by the width of the exposed white clay on each “end” of the C. Smooth them down so there aren’t any air bubbles.
  10. Now place the red “C” of clay on top, forming a whole circle of clay again. Roll and smooth clay.
  11. Wrap your log in another sheet of black clay and remove the excess with a polymer clay cutting tool. Let the clay rest and firm back up- place in the refrigerator if necessary.
  12. Reduce the cane by rolling the log and pulling gently until the cane is the size you like.
  13. Cut thin slices of the cane to use on your trinket box.
  14. Gather your scraps of clay, and mush them into a ball.
  15. Roll the ball into a log and double its length- then fold it in half and twist 3-5 times to create a marbled look.
  16. Roll out your scrap clay to the thickness of a nickel and 2” larger than the lid of your tin.
  17. Place the sheet of clay on the top of the tin and smooth with your fingers, using wax paper to keep the clay smooth. Trim away excess with the polymer clay cutter.
  18. Condition and roll out yellow clay to the thickness of a nickel. Using a small cutter, cut out yellow stars.


For more information visit: www.CraftTestDummies.com

Our Partners:


www.sculpey.com