|
Age Range: 7 to 12
Grade Range: 2 to 6
Skill Level: Moderate
Appropriate for These Special Events:
Every Day and Rainy Days
Supports Subject Areas of:
Social Studies
Language Arts – e.g. step by step instructions
Mathematics - measuring
Time needed for project:
1 ½ hour plus drying time
Designed by Lisa Galvin
Materials:
Activa® InstaMold™ flexible mold making material
Activa® Permastone™ casting material
Elmer’s® CraftBond® Tacky Glue
Elmer’s® Blue Gel Glue
DecoArt® Americana® acrylic paint: True blue, lemon yellow and warm white
Scrap burlap fabric
One old light switch cover
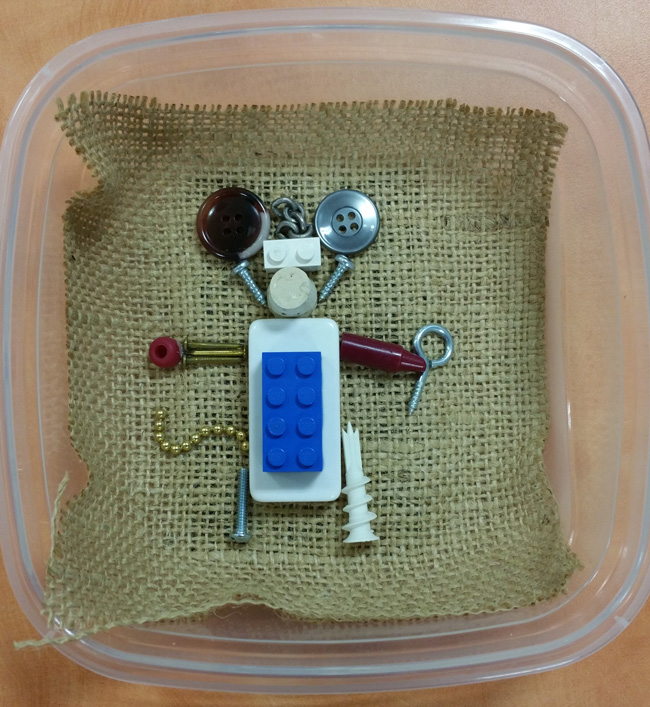
Odds and ends found around the home – Lego’s, domino, buttons, cork, crayon, mollies, screws, old chains, crayons, eye hook and nails
One sheet craft felt, neon blue
Shallow plastic container
Mixing bowl and whisk
Measuring cup
Paintbrush
Water container
Directions:
1. Attach burlap scrap on top of light switch cover with tacky glue. Burlap will give project a woven background texture. Assemble your mouse or other creature at center over the covered light switch which will give it stability. Make sure that your creature will fit inside your shallow plastic container. Let dry.
2. Follow manufacturer directions to mix the Instamold™ material, pour into the shallow plastic container, then lightly press your mouse and burlap into the mold making material. Do not submerge burlap. Let set as directed, then remove. Note that some pieces may be lodged in mold, but can be gently removed. Set pieces aside.
3. Once mold is set, cast your tile. Follow manufacturer directions to mix and pour PermaStone™ casting material into mold. Let dry.
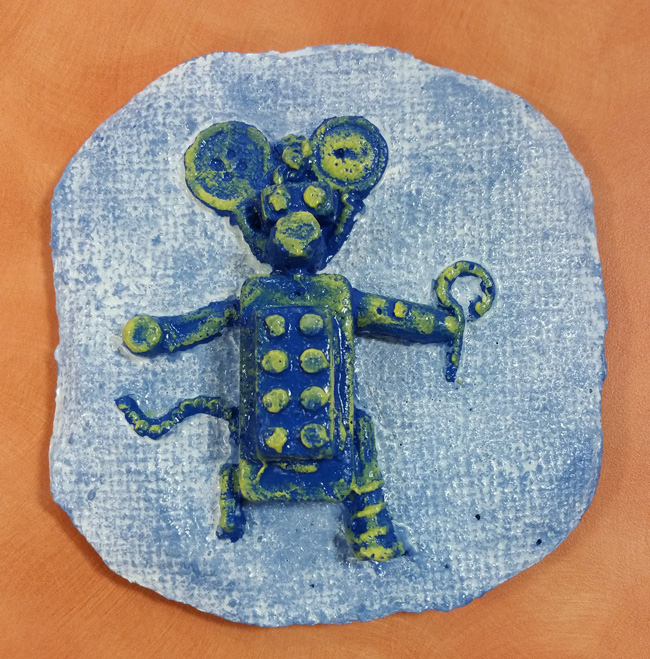
4. Paint entire top side of tile with true blue paint. Let dry. Color-wash burlap background by dipping paintbrush first into water, then lightly into warm white paint. Should be the consistency of milk. Apply over burlap background to bring out texture.
5. With a dry brush, dip tip into yellow paint, brush off excess paint so that only a small amount remains on paintbrush, then apply lightly to raised areas of the mouse or areas that you want to look weathered.
6. Seal top of tile by brushing with blue gel glue. Let dry. Trace tile onto a piece of felt, cut out, then apply to back of tile with tacky glue.
|