Age Range: 7 to 12
Grade Range: 2 to 6
Skill Level: Advanced
Appropriate for These Special Events:
Every Day and Rainy Days
Supports Subject Areas of:
Language Arts – e.g. step by step instructions
Mathematics - measuring
Visual Arts
Time needed for project:
1 to 2 hours
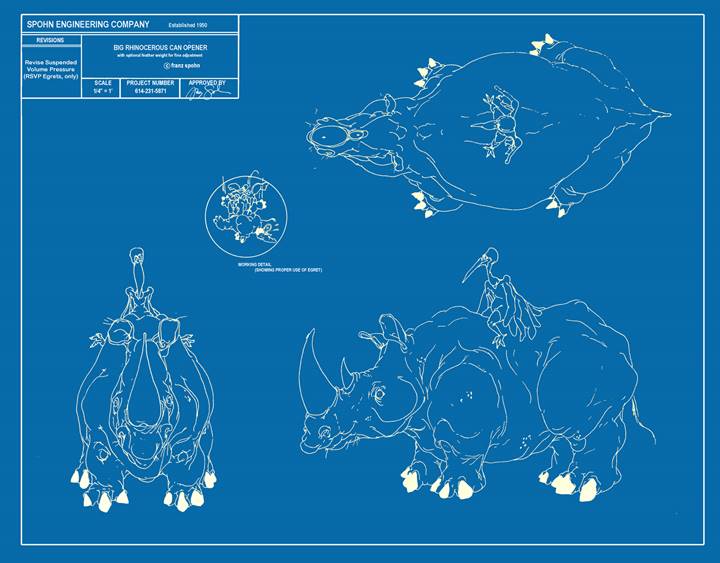
Technique: Drawing animals in various poses and from different visual perspectives
Materials:
Faber-Castell® Eco pencils and finishing media of choice (watercolors, markers, pencils, etc.)
Canson® Mixed Media paper, tracing paper
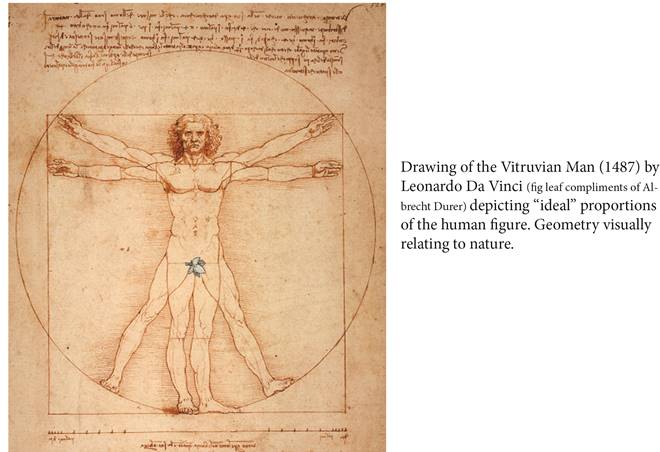
In a letter in 1904 to Emile Bernard, the famous French painter Cezanne wrote “May I repeat what I told you here: treat nature by means of the cylinder, the sphere, the cone” and I add the cube to the list. Essentially, what Cezanne is suggesting is of help in our quest to construct animals in various positions in order to create a more vital and interesting perspective and visual representation of our friends from the animal kingdom.
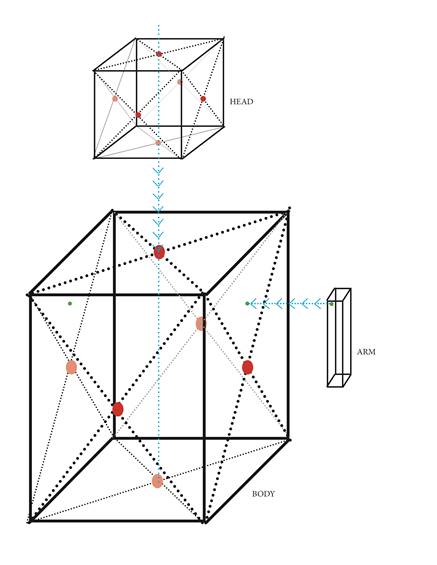
We will begin with these basic forms much the same as a sculptor would begin to create a statue with a block of stone or wood. These are questions to ponder as we construct this basic, beginning form.
What are the “parts” of the animal - legs, arms, head, tail, fins, claws, fingers, etc. and additionally the parts of each of these form - fingers, webs, nose, beak, etc. We begin with the general and later will work toward the specific.
What angle do we want to adopt? Do we want to look at it from an ordinary view point such as straight on or, most often, from the side or do we want to look at it from a more dramatic viewpoint such as from above (birds-eye view), from below (worms-eye view) or from a combination of approaches such as from below AND at a ¾ view – neither completely from the side or the front but somewhere in between. Selecting a more dynamic pose might give your drawings a more interesting visual effect and can help emphasize the action or emotion of a drawing (think of panels from action hero comic book - animals can be heros too!)

Once you have made your choices we are ready to begin!
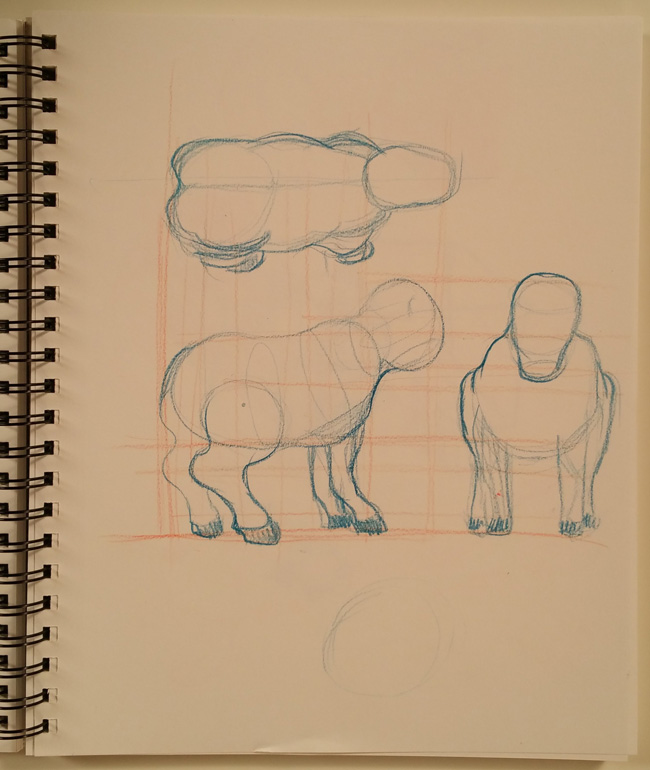
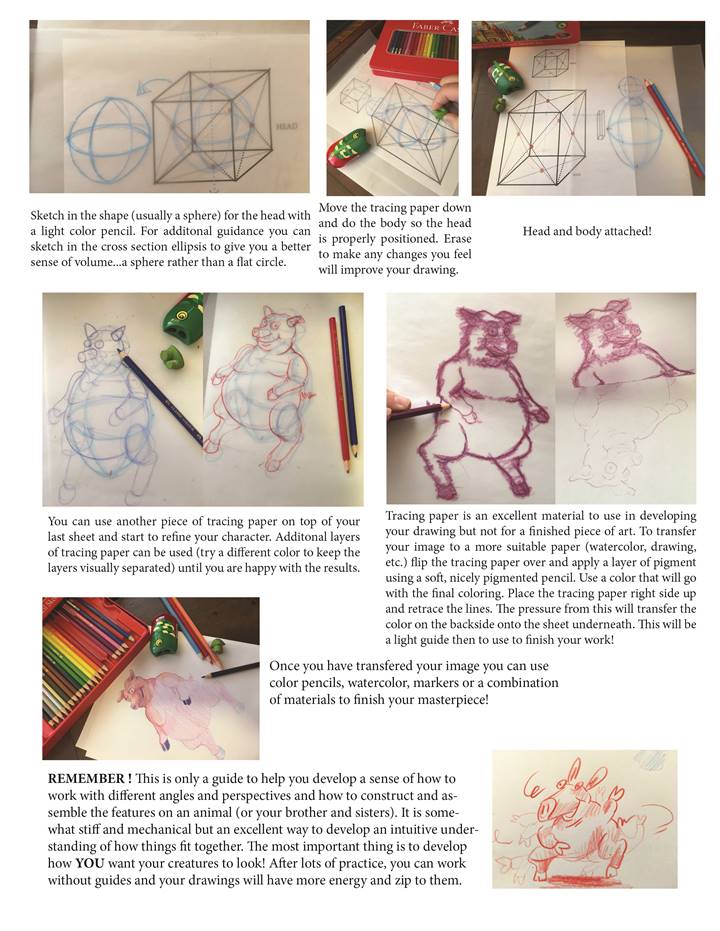
On a piece of paper sketch in boxes that will define position, scale and general look to your animal. Find the mid-point of the faces of your boxes for reference, this will help in placing the various bits and pieces of your animal. Start with the general and then work to the specific.

Once you have created a “rough” of how your animal is going to be positioned use a piece of tracing paper and start to refine the image (start rounding sharp angles similar to the way a sculptor begins chiseling away at a block of stone or wood…you are using your pencil for this!)
Before the advent of computer modeling, three basic views were drawn to help plan how to construct a building or object – the front, side and top. From these views an orthographic or isometric image could be created - a 3D view assembled from the above mentioned views.
|