| |
 |
|
|
|
|
 |
|
|
| |
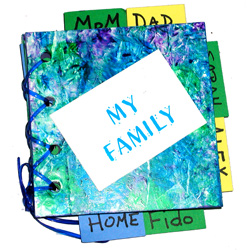
My Family Scrapbook
By Sandy Laipply
1007-5
 When
you see the “helping hand” symbol on a project, it means
you may need adult supervision to do the project. Always use care
when using tools or a heat source. Be careful and safe! When
you see the “helping hand” symbol on a project, it means
you may need adult supervision to do the project. Always use care
when using tools or a heat source. Be careful and safe!
Ask an adult to
cut (2) 4 ¼” squares from foam board for covers, and
cut thru the top layer of paper and the foam ½” in
from one edge of each.
|
|
Main supplies:
- 3-4 colors
of cardstock, including white
- Elmer’s®
Painters® Opaque Paint Marker - black
- Elmer’s®
Paintastics™ Paint Brush Paint Pens
- Small piece
of Elmer’s® Foam Board
- Pepperell
Crafts Plastic lacing – 30”
- Elmer’s®
Washable School Glue Stick
Basic Supplies:
- Plastic
bag
- Fiskars®
¼”hole punch
- Ruler
- Fiskars®
scissors or paper trimmer
- Pencil
- Plastic
knife
- Fiskars®
decorative edge scissors
- Black pen
- Craft knife,
cutting mat and straight edge
|
Instructions:
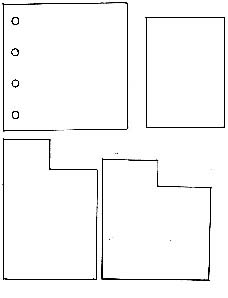
- Center the template
to mark each cover and punch holes where shown.
Decorate the foam board with paint pens. Dab 3 colors of
paint on the foam board. Immediately scrunch up a piece
of plastic bag and dab it into the paint to “marble”
the colors. Let dry. Repeat for other side.
- Measure, mark and
cut 4” x 4” squares from cardstock for pages.
Cut as many as desired using colors of your choice. Use
the template to mark each page and punch cardstock with
holes where shown. Score cardstock ½” in from
one edge.
- Use templates to
make as many tags as you need. Decorate tags as you like,
using cardstock, decorative scissors, and paint pens. Write
the category on the end of the tags and glue the tags into
your book. Use the template to make as many mats as you
like and glue these into your book. Add photos or journaling
to these pages.
- Arrange the pages
and covers as desired, lining up the holes. Starting at
the bottom, thread the lacing thru the holes, going over
the cover each time. Come back down to the bottom and tie
your book together.
- Cut a 2” x
3” rectangle of white cardstock. Use the marker to
write
“ My Family” on this rectangle. Glue to front
cover of book.
Sponsored By:
|
| |
|
|
Home
| Television | Projects
| Book Order | Helping
Kids | Teachers | Philosophy
E-mail questions about Hands On Crafts for Kids to info@craftsforkids.com
© Copyright 2004 Katherine Stull, Inc.
|