Instructions:
- Assemble four skill
sticks into a square, notching corners and dotting each
corner connection with glue. Let dry.
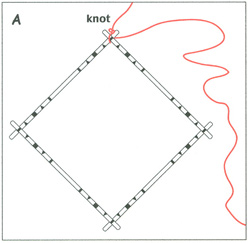
- Tie one end of embroidery
floss to one corner of frame with a square knot. Dot knot
with glue. Diagram A
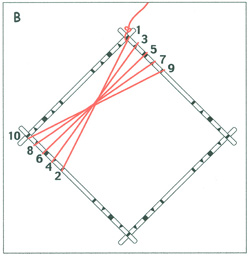
- Wrap floss around
sticks according to numbered chart. Diagram B
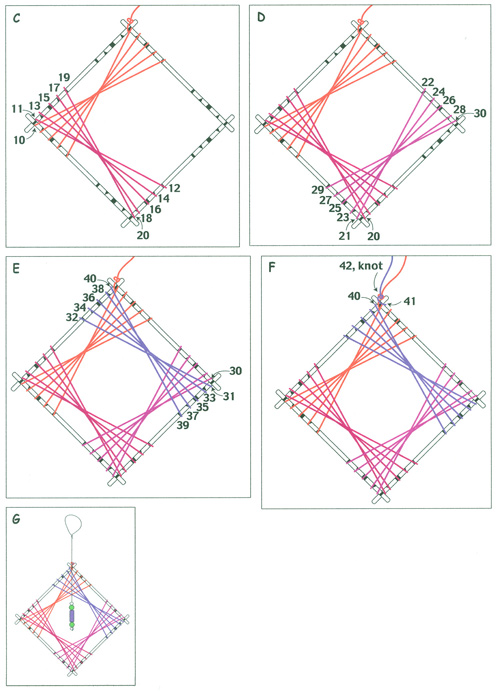
- Wrap floss down at
corner (#10), then up under stick (#11). Continue wrapping
the next section. Diagram C.
- Wrap two remaining
sections. Diagrams D and E. Knot floss end with starting
thread. Diagram F.
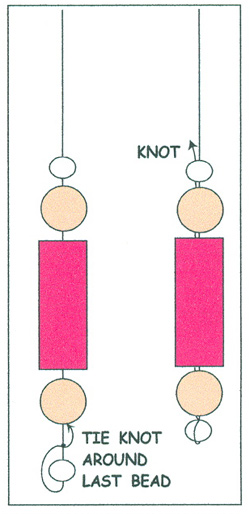
- Cut a 24” length
of clear fishing line. Thread beads on string end. Wrap
end 3-4” tail around last bead and tie a knot. Thread
remaining tail through beads. Tie a knot above beads. Cut
tail. Center beads in string art ornament. Tie fishing line
to top corner. Tie a hanging loop in fishing line end. Diagram
G.
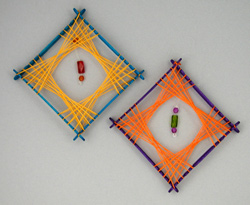
String Art with a Twist
Use plastic pony beads and lacing instead of embroidery floss.
On the third and fourth round of lacing, the skill sticks
will begin to bend. This string art form can rest on a table
top, or hang on a string.
String Art Using Yarn
Use yarn instead of embroidery floss for another interesting
effect. Beads can be added to the ending string and used as
the hanging loop.
Sponsored By:
|