| |
 |
|
|
|
|
 |
|
|
| |
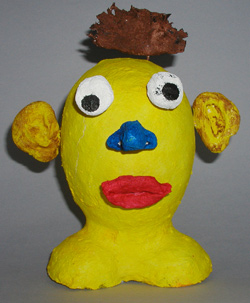
Mr. Build A Face
By Andi Rothenberg
1013-5
|
 |
Main supplies:
- FloraCraft®
Styrofoam® 5 7/8” x 3 7/8” ostrich egg
- FloraCraft®
Styrofoam® 3 1/16” x 2
- 15/16”
duck egg
- Activa®
Celluclay® Bright White Instant
- Papier Maché
- Elmer’s®
Squeeze n’ Brush™ Washable
- Paints
Basic supplies
- Toothpicks
- Large gallon
size zipper closure plastic bag
- Plastic
knife
|
Instructions:
- Mix the papier maché
inside of the plastic bag following the instructions on
the package. This will keep the papier maché neatly
stored for you to use.
- Have an adult cut
the small egg in half lengthwise to make a base for your
head. Place the 2 halves side by side and stick a toothpick
into the top middle of each one. Place the small end of
the large egg on top of the toothpicks, pushing down so
that the toothpicks go all the way into the egg to hold
it standing straight up.
- Begin covering the
eggs with the papier maché. Press the wet papier
maché onto the eggs, smoothing it out as you go,
keeping it as thin as possible. You do not need to cover
the flat bottom of the small eggs. Smooth out the papier
maché the best you can. You can also wet your fingers
to smooth it out.
- Push a toothpick
at least halfway into the head, through the papier maché
at every spot where you want to be able to put different
face pieces, for example; eyes, nose mouth, ears, holes
on top of the head for either horns or hair. Be sure to
wiggle each toothpick a little bit so that the papier maché
will not stick to it. The toothpicks will be pulled out
when the head is dry; they are just there to “hold”
the holes open. Allow to dry.
- Create some fun face
parts to add to your head using the papier maché;
eyes, noses, mouths, a tongue, ears, horns. Stick a toothpick
into the back of each piece so that it will stay in to be
used to build your face. If the piece is thin, you can add
a small ball of papier maché around the toothpick
to hold it in place. Allow to dry.
- Use the Squeeze n’
Brush® paints to paint the head and all of the pieces
and have fun creating different funny faces!
Sponsored By:
|
| |
|
|
|
Home
| Television | Projects
| Book Order | Helping
Kids | Teachers | Philosophy
E-mail questions about Hands On Crafts for Kids to info@craftsforkids.com
© Copyright 2004 Katherine Stull, Inc.
|