| |
 |
|
|
|
|
 |
|
|
| |
41
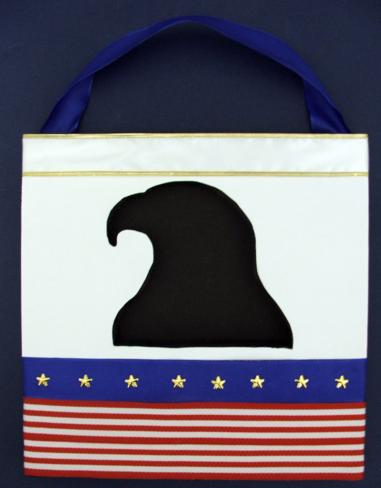
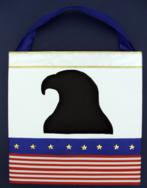
The eagle is the symbol of freedom in the United States and the national bird.
 |
When
you see the “helping hand” symbol on a project, it means
you may need adult supervision to do the project. Always cover your work surface with a mat or some type of protective covering like wax paper or plastic. Always use care when using tools or a heat source. Be careful and safe! |
Always cover your work surface with a mat or some type protective covering like
wax paper or plastic.
Age Range: 7 to 12
Grade Range: 1 to 6
Skill Level: Advanced
Appropriate for These Special Events:
Fourth of July
Every Day and Rainy Days
Supports Subject Area(s) of:
Social Studies
Language Arts – e.g. step by step instructions
Visual Arts
Time Needed for Project:
1 hour plus drying time
 |
This project features notes or instructions in Adobe Reader format. If you
do not have Adobe Reader, download it for free here. |
|
|
- 12x12x1” STYROFOAM™ Brand Foam sheet
- STYROFOAM™ Brand Foam Saw or Cutter
- Two 12” x 12” white cardstock
- Coordinating Patriotic Ribbons – 1” wide
- Gold Star Brads, Nailheads or Stickers
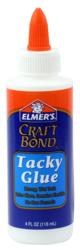
- Elmer’s Craft Bond Tacky Glue
- Basic Supplies:
- Small Scissors
- White Tacky Glue
- Serrated plastic knife
- Straight pins
|
Step 1: Trace Eagle pattern onto cardstock and cut out to create template.
Trace and cut out Eagle template from center of white paper, if you trace the template face side down you will keep from having the trace marks show on the front side. Center the template on the paper with the bottom of the template about 5” up from the bottom of the paper. Carefully cut out eagle from center of the paper.
Step 2: Lay the cut out paper lined up evenly with the edges of the Styrofoam sheet. Hold the paper in place and lay the template inside the cutout and pin in place. This ensures that the Styrofoam cut out is lined up correctly with the paper cut out.
Remove the paper and use the small blade of the Styrofoam saw to cut out the Eagle template from the Styrofoam. The smaller blade is better for detailed cutting and the larger blade is better for larger straight cuts. Hold the saw at a 90 degree angle with the face of the Styrofoam, slowly cut around the template. Use a continuous sawing motion with short strokes especially in tight corners or turns the saw will turn more easily. Don’t try to push the saw through the Styrofoam the up and down motion of the saw leaves the cleanest cut edge.
Step 3: Glue black ribbon to edge of eagle cut out and edges of Styrofoam sheet.
Step 4: Glue paper cut out to front of Styrofoam cut out.
Step 5: Glue ribbon embellishments to wall art. Attach gold star nail heads or you could use stickers or sequins.
Step 6: Glue black paper to back of wall art.
Step 7: Glue ribbon hanger to back of wall art.
|
Travel around the world and experience the culture, arts and traditions that make the world unique. Visit Peru, Italy, Canada, USA, Australia, Japan, China, Russia, India, Mexico, Ghana, Egypt, and Scotland.
Click here to order now!
|
|
| |
|
|
Home
| Television | Projects
| Book Order | Helping
Kids | Teachers | Philosophy
E-mail questions about Hands On Crafts for Kids to info@craftsforkids.com
© Copyright 2010 Katherine Stull, Inc. |