Instructions:
1. Using the cutting
mat, ruler and rotary cutter or scissors, cut one 22"
x 22" square of fabric.
2. Cut two rectangles
of fabric 22" x 15" for the back envelope closure.
3. On the pillow front
piece, measure and mark 3" from each raw edge, using
a chalk pencil. This line is your stitching line to form the
flange or border of the pillow.
4. Using an extra fine
tip marker and ruler, draw five 4" squares onto the clear
vinyl.
5. Cut out the four vinyl
squares, using pinking shears. Be sure to cut inside the lines
so the permanent marker lines will not show on pillow.
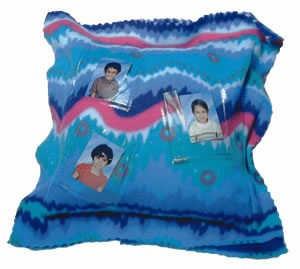
6. Place the vinyl squares
onto the right side of the fabric square, inside the lines
drawn to mark the flange. Arrange the squares any way you
like. Using masking tape to tape them in place.
7. Thread the sewing
machine. Select a 4.0 straight stitch then snap on the teflon
foot.
8. Stitch down one side
of the vinyl pocket, about 1/4" from the edge of the
vinyl pocket. Stop stitching about 1/4" from the bottom
edge of the pocket.
|
9. To turn the corner
at the bottom edge, put the needle down into the fabric. Raise
the presser foot. Turn the fabric so you will be stitching
across the bottom of the vinyl pocket. Put the presser foot
back down and continue sewing across the bottom edge. Turn
the other corner the same way. Leave the top of the pocket
open so you can slip photos into the pocket. Remove the masking
tape.
10. Lay the two back
pieces onto the pillow front, wrong sides together. Pin in
place.
11. Matching the raw
edges at the pillow bottom and sides, lay the lower back piece
onto the pillow front, wrong sides together. The edge of the
lower back piece will overlap the edge of the upper back piece.
Pin in place.
12. On the front of the
pillow, pin both layers of fabric together around the marked
flange line. Using a straight stitch, stitch along the drawn
lines to form the flange. Stuff the pillow with a pillow form.
13. Insert photos, ticket
stubs, ribbons or other fun memorabilia into the vinyl pockets. |