| |
 |
|
|
|
|
 |
|
|
| |

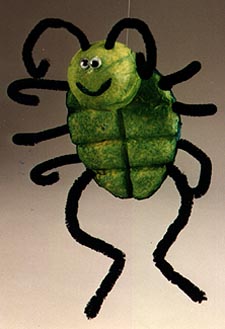
by Patty Cox |
Bet you haven't seen a bug
like this one in your back yard! If bugs walked on back legs,
this is what they might look like. Have fun with a new technique
using Styrofoam, tissue paper and even a little glitter glue.
You will
need:
- 4" Styrofoam®
egg
- 1" Styrofoam®
ball
- 4 Black 6mm chenille stems
- Sheet Dark Green tissue
paper
- Sheet Light Green tissue
paper
- Scissors
- Two 7mm Wiggle eyes
- School glue
- Green glitter gel
- Craft stick
- Toothpick
- Paintbrush
|
 |
|
|
|

|
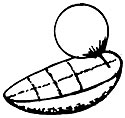
-
Cut Styrofoam
egg in half using a plastic knife. Hint: It will be easier to
cut if you rub an old candle over the cutting edge of the knife.
Rub the two halves together to sand any rough edges. Indent
chest pattern on the flat side of one half of the egg with a
craft stick.
-
Spread glue
over the flat side of the egg using a wet paintbrush. Make sure
to cover all indented areas. Place a 5" square of light
green tissue paper over the glued area, pressing lightly with
the craft stick into each of chest indentations. Trim away excess
tissue paper, leaving 1/2" around the edges. Glue these
edges to the back of the egg. Allow to dry.
-
Spread glue
over the back of the egg then place a 5" square of dark
green tissue paper on the back. Trim away excess so that it's
even with the sides. Cut one 5" square piece of light green
tissue paper and set aside. You will use this piece for the
head. Cut remaining tissue paper into 1" squares. Spread
glue over the back of the egg then stick tissue paper squares
over the entire back, alternating dark and light. Brush over
the top with glue.
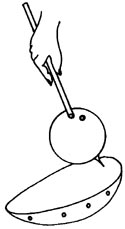
-
Spread glue
over the Styrofoam ball. Cover with the light green tissue paper.
Paint over the tissue with more glue. Cut away excess tissue.
Push one end of the toothpick into the ball at the trimmed edge.
Cover the rest of the toothpick with glue then insert the opposite
end into the front of the body at the top. (This is the rounded
part of the egg.)
-
Cut two
of the chenille stems into four equal parts to make six arms
and two antennae. Fold each of the two remaining chenille stems
in half and twist together to make two legs. Use a pencil to
poke three holes on each side of the body for the arms, two
holes on top of the head for antennae and two holes at the bottom
for legs. Dot ends of the chenille with glue then push into
place. Glue wiggle eyes onto the face then add a smile using
glitter gel. Shape the arms and legs.
|
Home
| Television | Projects
| Book Order | Helping
Kids | Teachers | Philosophy
E-mail questions about Hands On Crafts for Kids to info@craftsforkids.com
© Copyright 2004 Katherine Stull, Inc.
|


