| |
 |
|
|
|
|
 |
|
|
| |

by Tracia Ledford Williams
|
|
 You
can't have a garden without water! Plants need this nourishment
for growth. Create a fun design using special paint on a metal watering
can. You
can't have a garden without water! Plants need this nourishment
for growth. Create a fun design using special paint on a metal watering
can.
You will need:
- Galvanized watering can
- Metal paint - Red, Black,
White and Yellow
- Round paint brush
- Paper plate
Instructions:
|
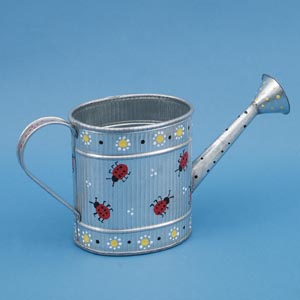
- Dip pointer finger
into the red paint then use you finger to apply the lady
bug bodies around the center of the watering can.
- Dip baby finger into
the black paint, apply the dot to the lady bug's head next
to the body. The lady bugs can go in any direction on the
center of the watering can.
- Using the round paint
brush and black paint add the legs and the antennae to the
lady bugs. Let the paint dry. Now dip the handle of the
brush into black paint and apply the 6 spots to the lady
bug.
- Add large yellow dots
using your pointer finger and yellow paint, around the top
and bottom of the watering can. Using the handle of the
brush and white paint, add the small white dots around the
yellow dots and trios of dots in the area of the ladybugs,
creating flowers. Add a black dot between each flower with
the handle of the brush and black paint.
- Add the following
dots to the following areas, using the handle of the brush:
red paint to handle, black paint to long part of spout and
yellow paint to the top of spout.
- Allow paint to dry
and cure for 10 days, then it is permanent.
|
|
Delta PermEnamel™ Paint; Eagle® Brush Kid's Are
Painters Too Paint Brushes. |
|
|
Home
| Television | Projects
| Book Order | Helping
Kids | Teachers | Philosophy
E-mail questions about Hands On Crafts for Kids to info@craftsforkids.com
© Copyright 2004 Katherine Stull, Inc.
|


